Articles - Applications
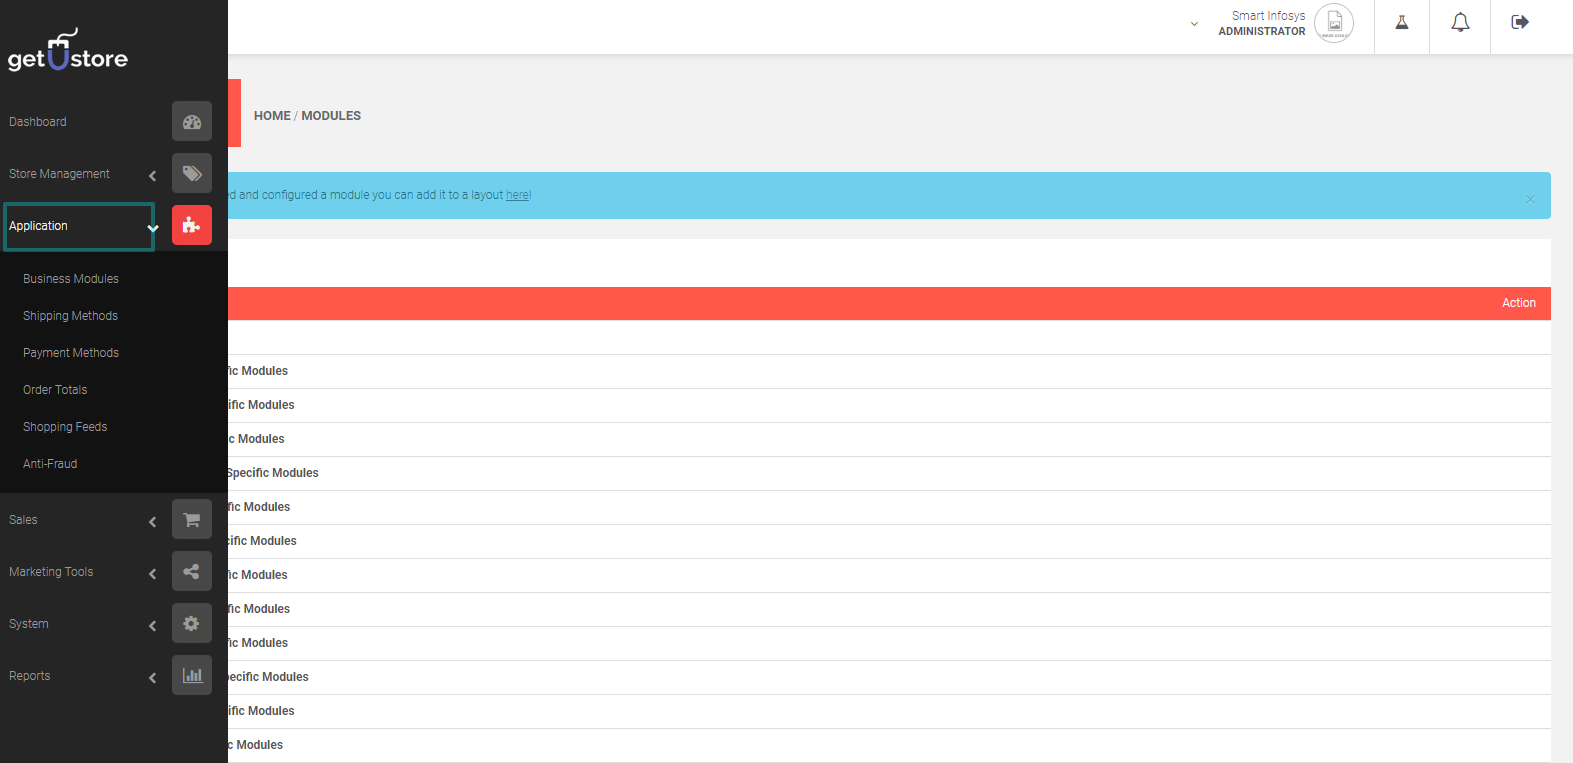
The shipping methods extensions can be accessed under Applications > Shipping Methods.
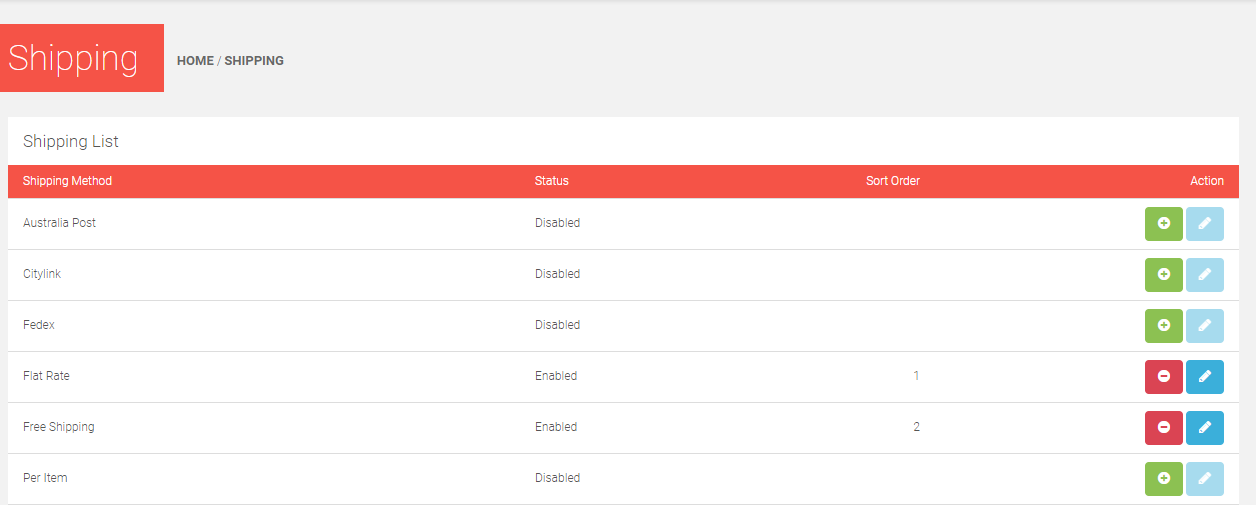
The Shipping Methods that you want to use should be installed before they can be enabled or disabled from the store. To add a shipping method click on install button under Action. After the installation is done, you can edit the specifications of that shipping method, or even uninstall or remove the shipping method information if required.
Adding Fedex Method

You can install the Fedex method from Application>Shipping.
To edit this shipping method, you can click on the edit icon, and make the necessary changes.
To edit Fedex Shipping Method:
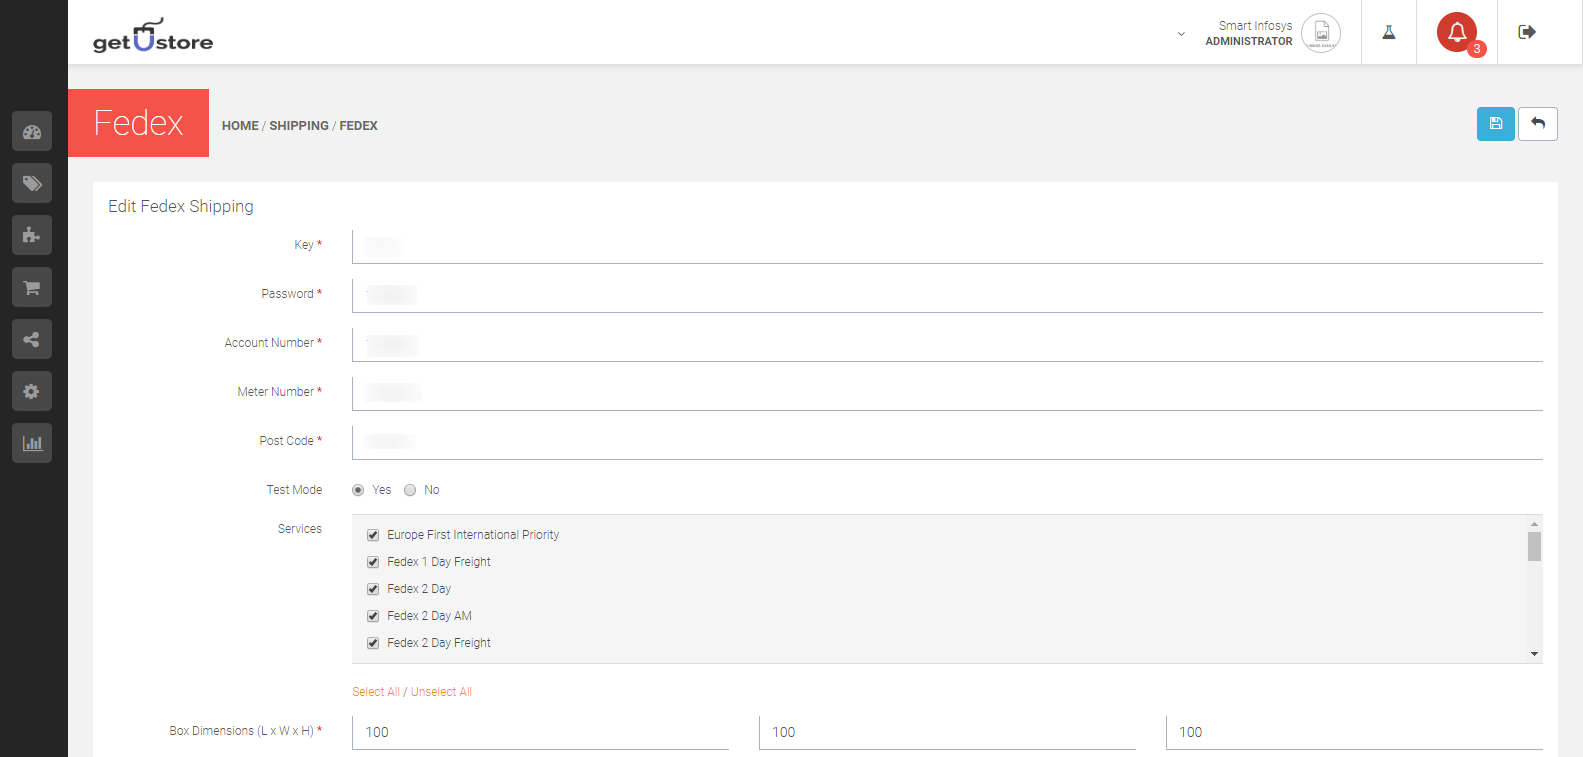
You can add Fedex account with the Key, password, account number, meter number provided by fedex.
You can check/uncheck the Fedex service that will be offered to your customers.

You can mention the dimension of the boxes(define a length class for the same), and other necessary details as mentioned below.
Drop off type:

Select which is applicable to your business type.
Packaging Type:

Select which is applicable to your business type.
Rate Type:

Select the Rate type as applicable to your business type.
You need to edit Shipping Methods individually according to your shop’s requirements and to specify the prices for that service. The following details are required for all shipping requirements.
- Geo Zone:Mention the geographical zone that this shipping method is available to. The Geo Zone can be created and configured in localization.
- Status:The status determines whether the shipping method will be available in the storefront.
- Sort Order:You can give a sort order to the shipping methods as per priority.

When you edit the shipping methods in the admin panel, it will affect the shipping methods available to customers in both storefront Shopping Cart and Checkout pages.
Shopping Cart
The shopping cart has a special feature called “Estimate Shipping & Taxes” that will calculate a shipping payment for a customer’s order. See Order Totals to enable or disable this feature. When a customer enters their regional information, a popup window will ask the customer to select a shipping method. In this window, every shipping method that is enabled under Shipping Methods will be listed according to their sorting order.
Checkout
In Step 4 of the Checkout, the customer will need to select a shipping method before finalizing their purchase. The Delivery Method will display every shipping method that was enabled in the administration.

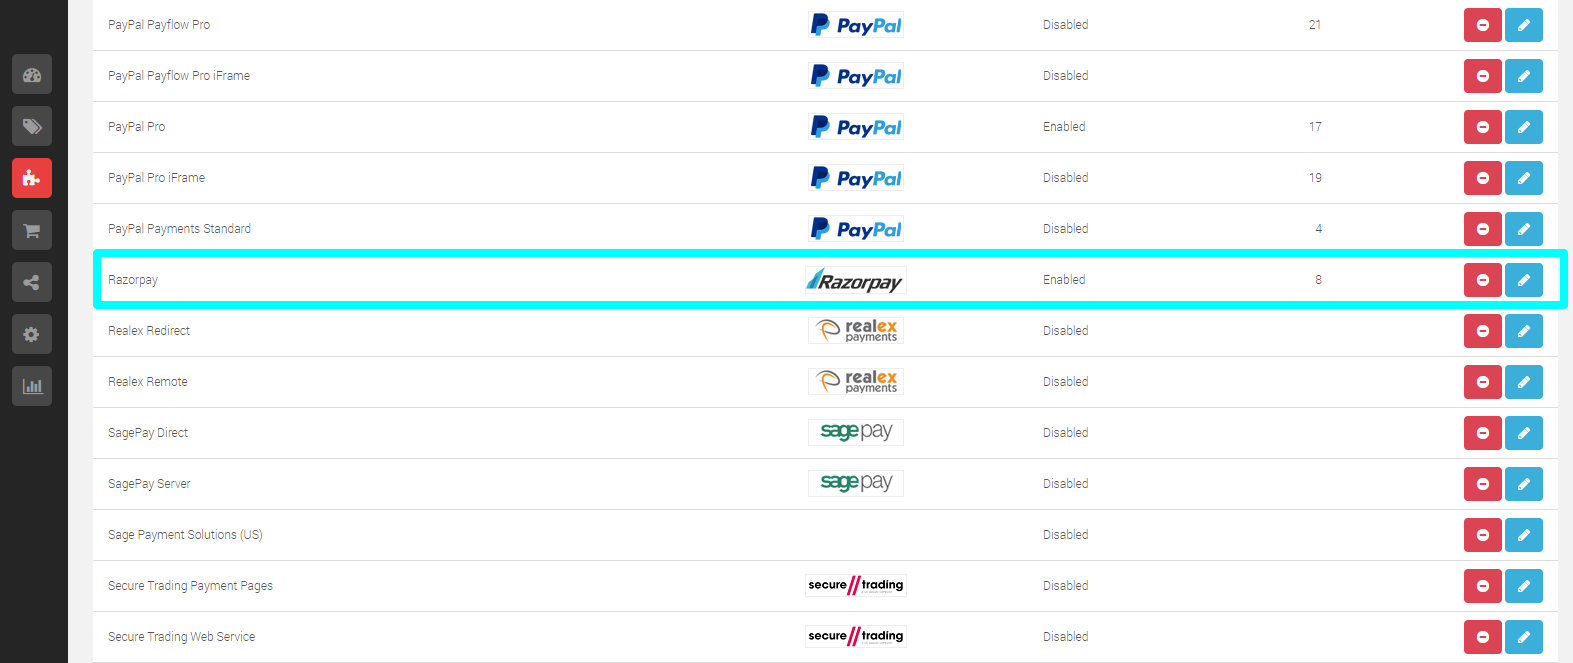
getUstore offers a variety of Payment methods, from Bank transfers to online payment gateways. getUstore offers the following payment methods.
- 2Checkout
- Alipay Pay
- Alipay Cross-border
- Amazon Pay
- Authorize.Net (AIM)
- Authorize.Net (SIM)
- Bank Transfer
- BluePay Hosted Form
- BluePay Redirect (Requires SSL)
- CardConnect
- Cardinity
- Cheque / Money Order
- Cash On Delivery
- Divido
- eWAY Payment
- First Data EMEA Connect (3D Secure enabled))
- First Data EMEA Web Service API)
- Free Checkout
- G2A Pay
- Globalpay Redirect
- Globalpay Remote
- Klarna Account
- Klarna Checkout
- Klarna Invoice
- Lay-Buy
- LIQPAY
- NOCHEX
- Paymate
- PayPal (Powered By Braintree)
- PayPal Express Checkout
- PayPal Payflow Pro
- PayPal Payflow Pro iFrame
- PayPal Payments Standard
- PayPal Pro
- PayPal Pro iFrame
- PayPoint
- Payza
- Perpetual Payments
- Pilibaba for Chinese Checkout
- Perpetual Payments
- Realex Redirect
- Realex Remote
- SagePay Direct
- SagePay Server
- Sage Payment Solutions (US)
- Secure Trading Payment Pages
- Secure Trading Web Service
- Skrill
- Square
- Web Payment Software
- WorldPay Online Payments
Editing a payment method
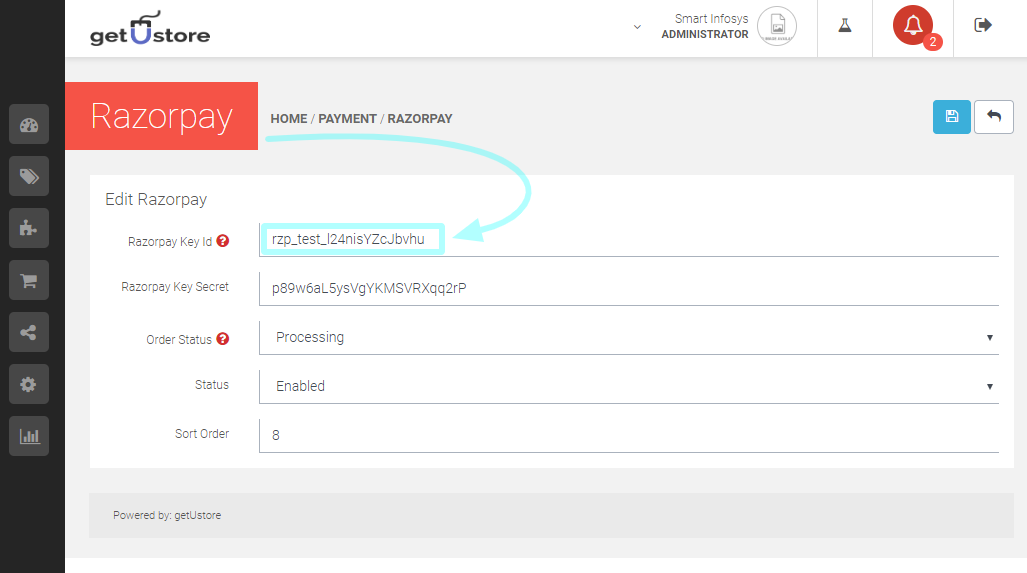
You can edit the payment methods in the admin panel for different transactions but it will require a previously created account. The account and the payment information must be obtained from these companies before editing the payment method in the admin panel. You will have to create an account with these companies before to use their transaction processing for getUstore. The information required for each payment method will be displayed in the Edit section. Across payment methods, there are a few details that need to be filled:
- Order Status:Mention a default status of the order, once the payment module is completed. Pending is the most common default status as it gives the administrator some time to process the order.
- Status:You can enable or disable the payment method from here.
- Sort Order:Mention the position of the payment method in the storefront when listed among all available payment methods.
Payment Method in the Checkout
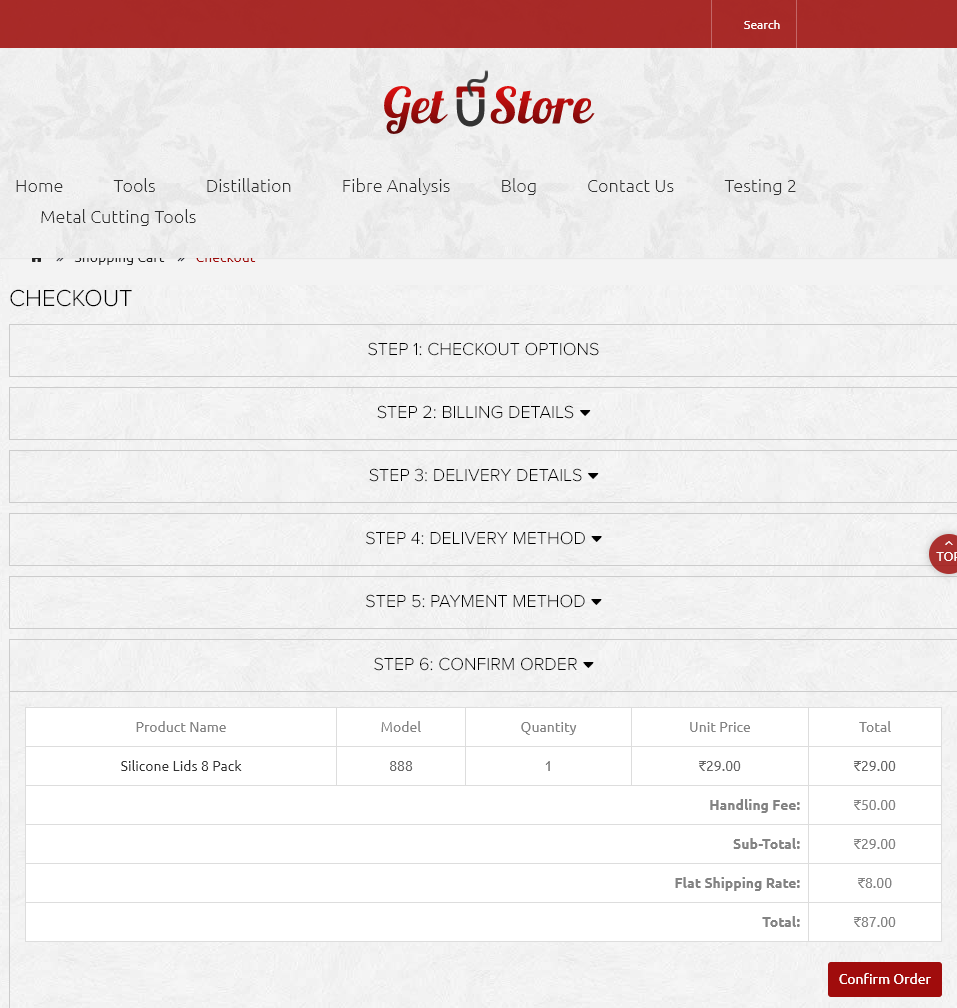
When you enable a payment method in the admin panel, it becomes available in the checkout. While Checkout , In Step 5 of the checkout the customer will be given a radio type selection to select their preferred payment method.
Payment Method in Order History
Once the customer has confirmed the order, they can visit their Order history in their Account page to view its status. After the checkout, the status will display the default order status you selected when editing the payment method details.
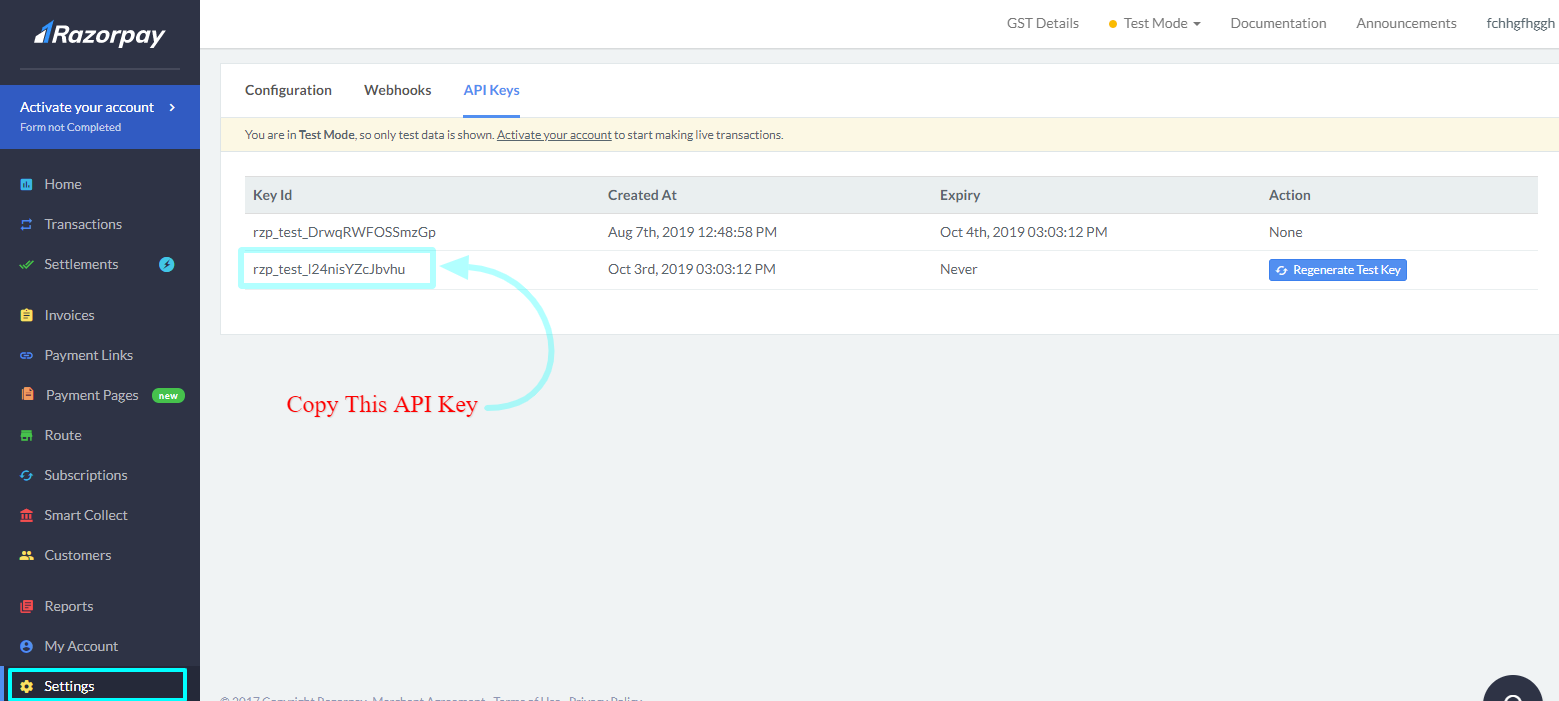
Configuring a Payment Method (We will show you how to configure razorpay)
Login to Razorpay website & navigate to settings
Here is how it will reflect in storefront while checkout(Step-wise):

Select the Razorpay payment method to pay.
Click on the Confirm Order to confirm Order & navigate to Payment getaway.

Enter Your Phone Number & Email to receive the OTP.
You can Pay using Card, netbanking, wallet or UPI. Here we’re showing you payment using CARD.
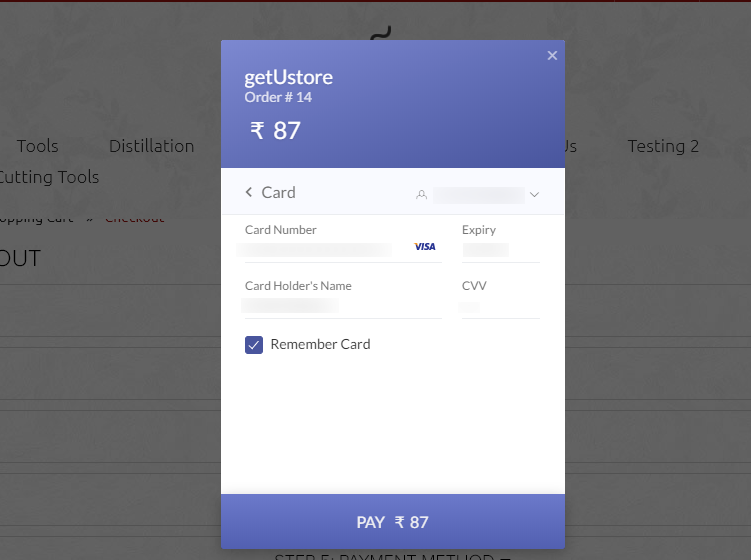
Fill-in your card details & click on the PAY button.
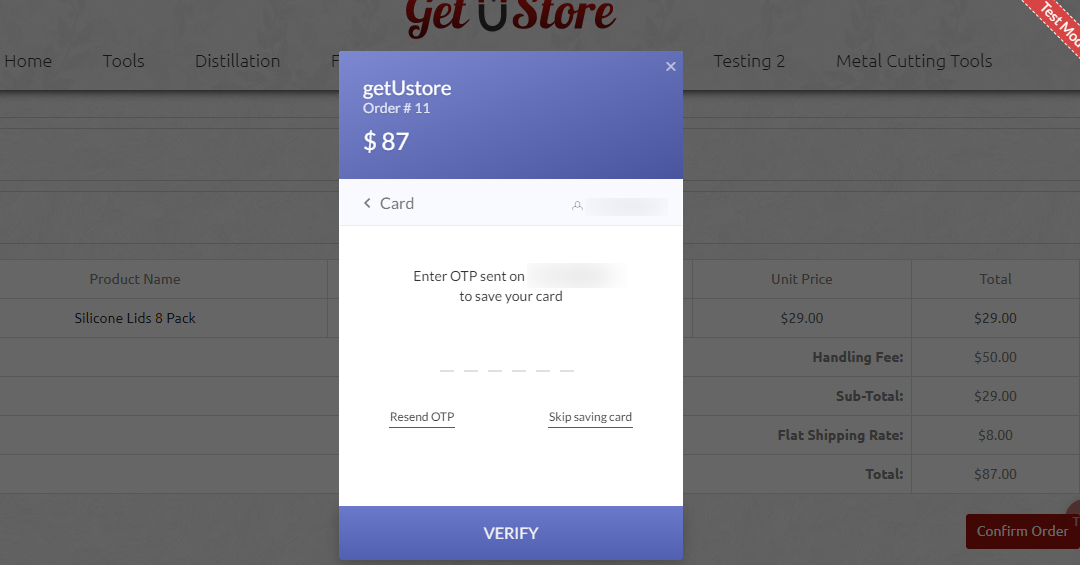
After clicking on the PAY button, you’ll navigate to the screen above, enter the OTP & verify your mobile number/email.
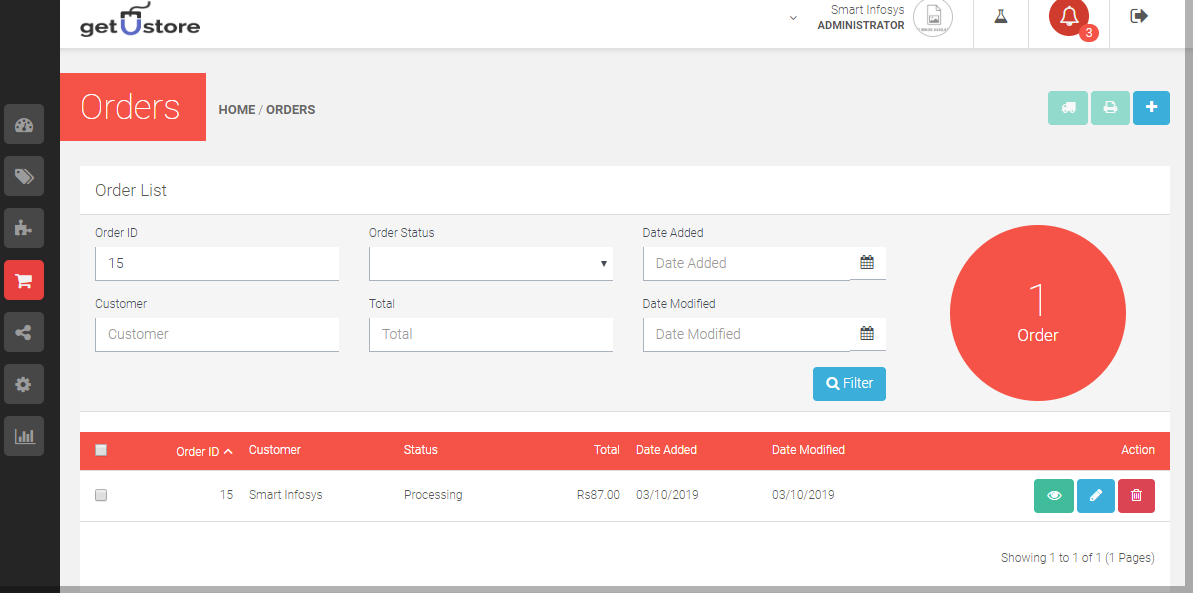
Once the payment is successful, it will reflect in the order section as shown above.
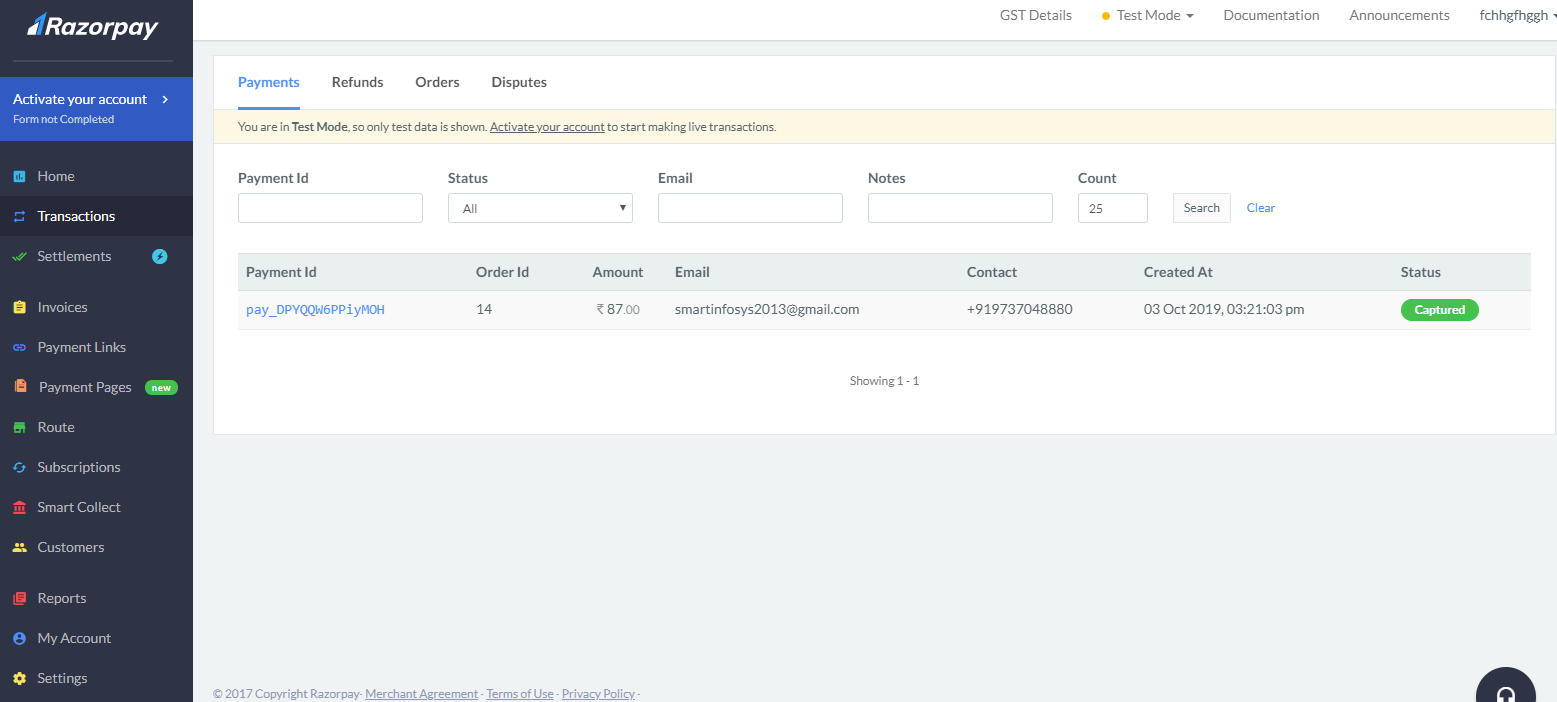
The transaction details will be reflected in your razorpay account as well as shown below.
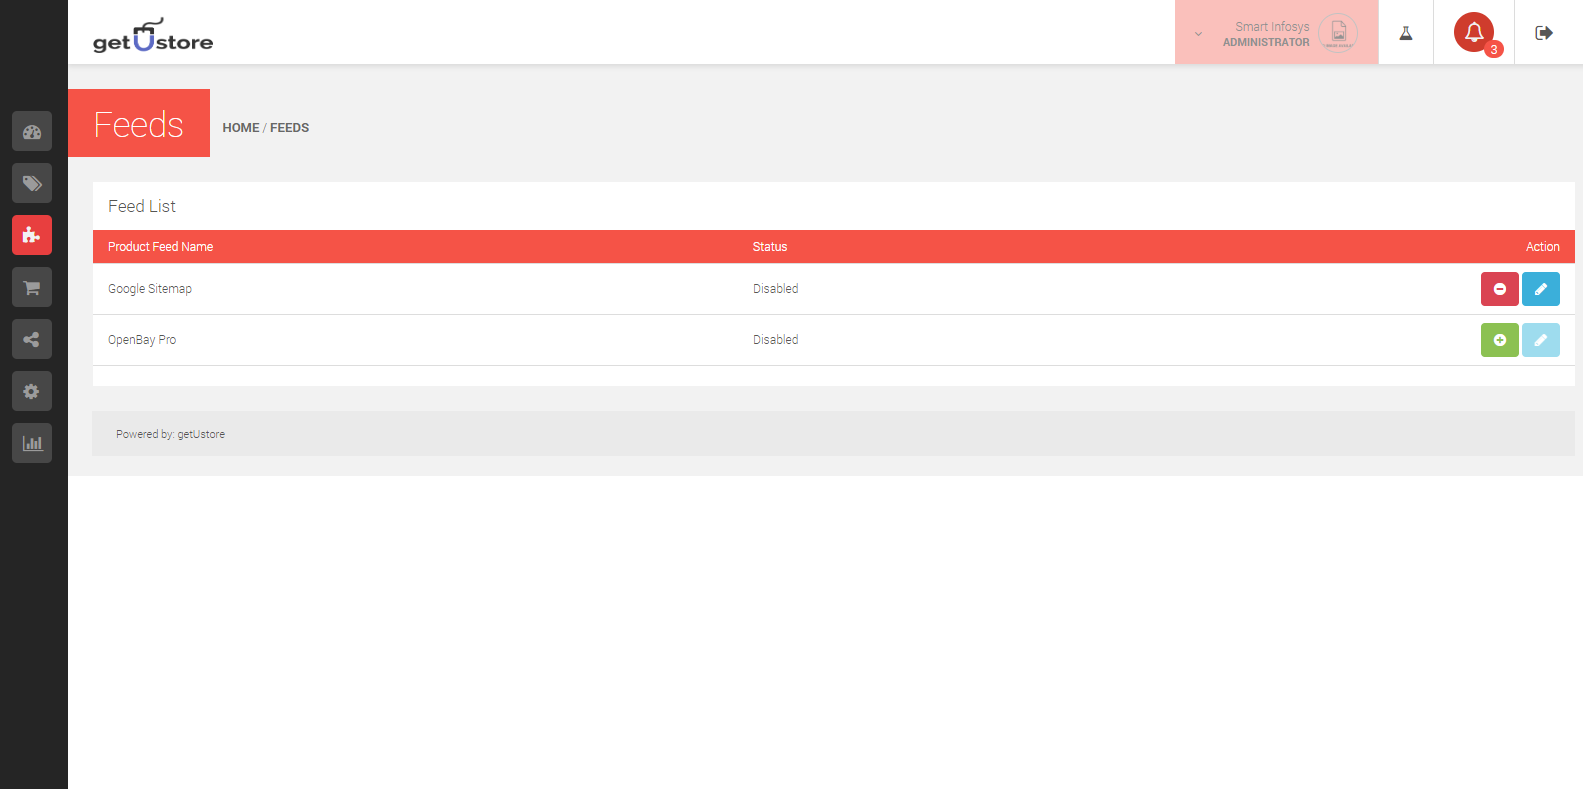
The getUstore package lets you connect to two product feed tools, i.e 1. Google Base and 2. Google Sitemap.
You have to create an account at the Google Merchant Center to access these tools.
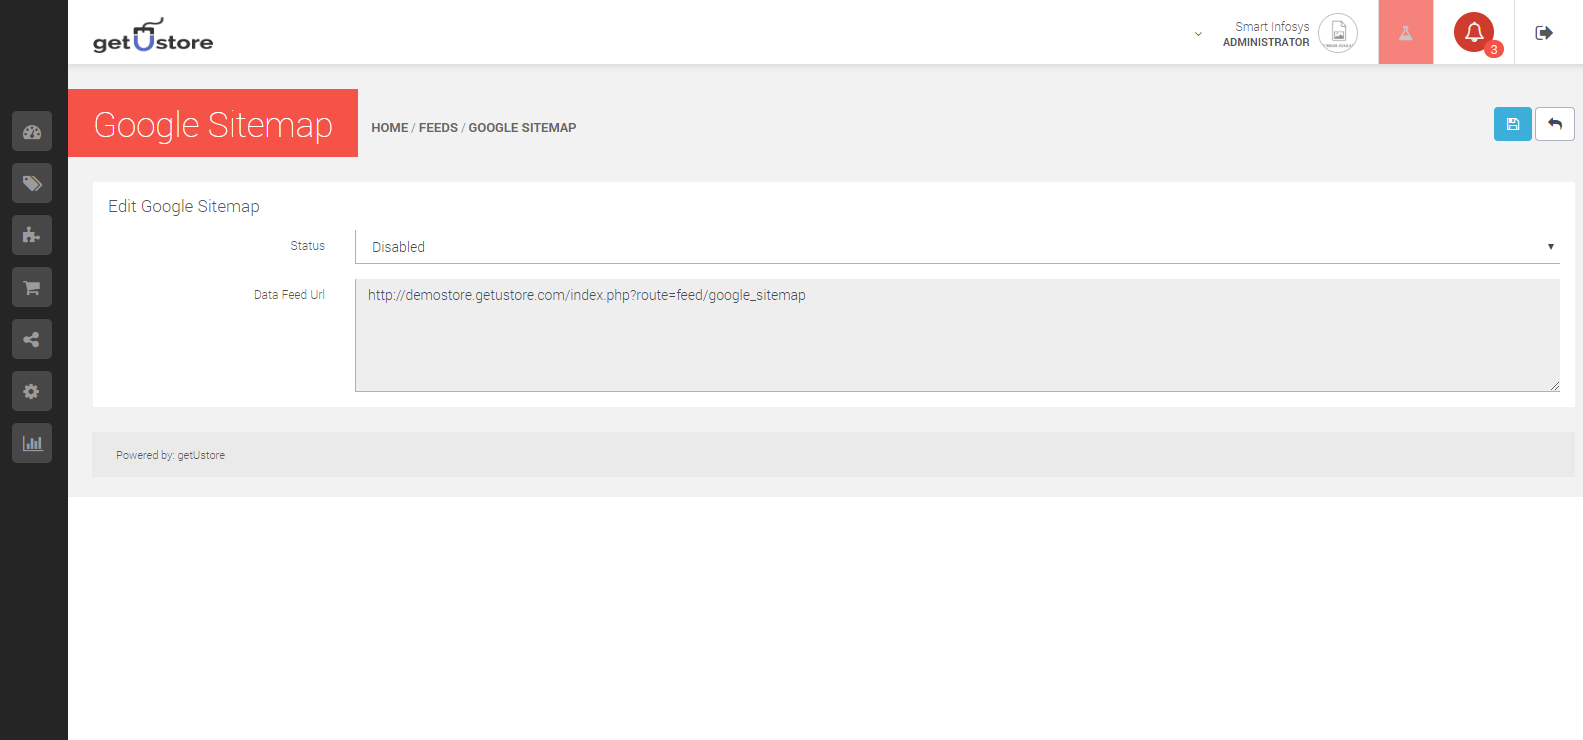
Google Sitemap uses a data url from the store website to provide information to its search engine to crawl the store’s website.
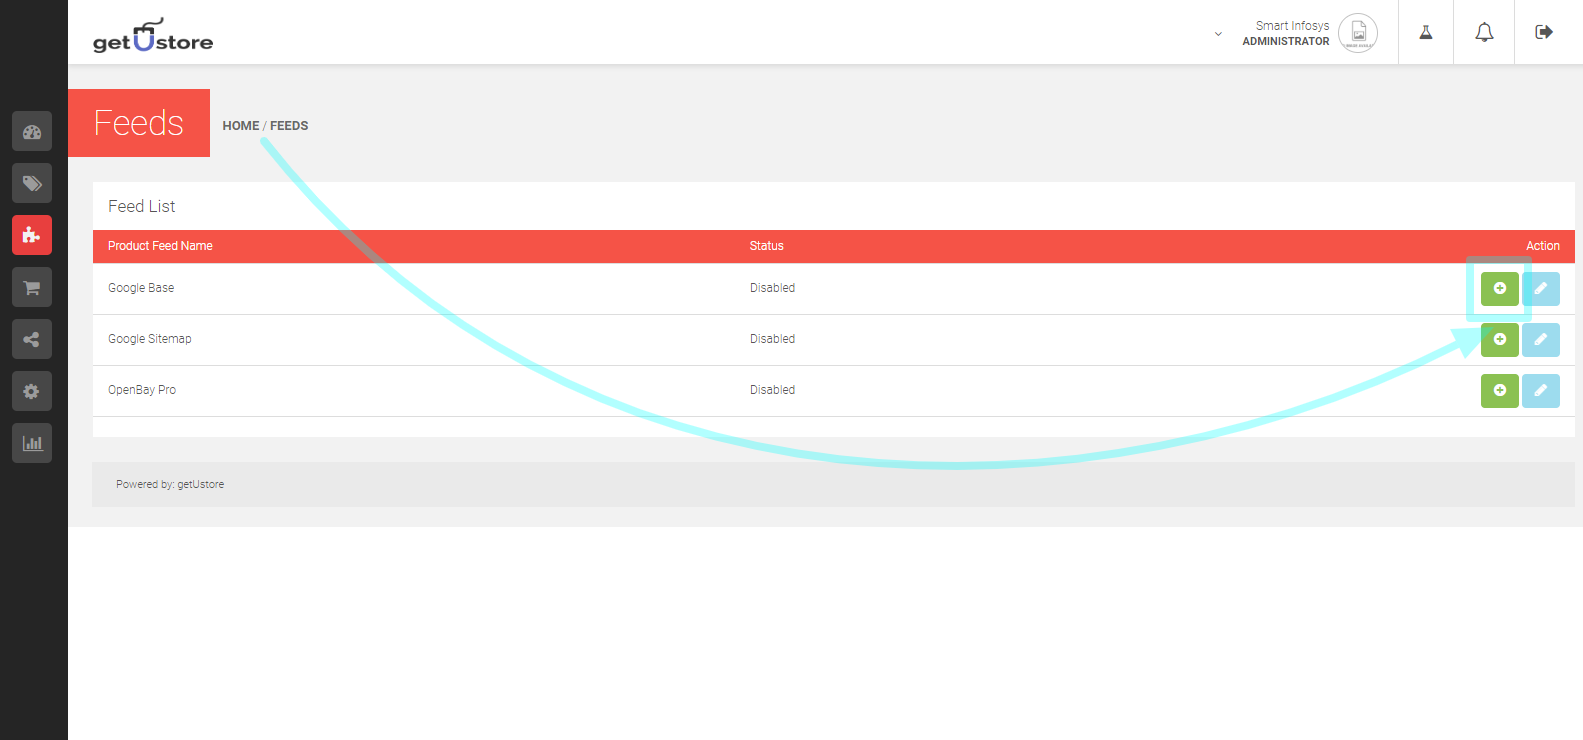
You can click on the Green Icon & install the Shopping Feed.

Once you install the feed module, the green icon will change to red as shown above, you can click on the EDIT icon & make the changes.
When you click on the edit icon, you will be redirected to the page below:
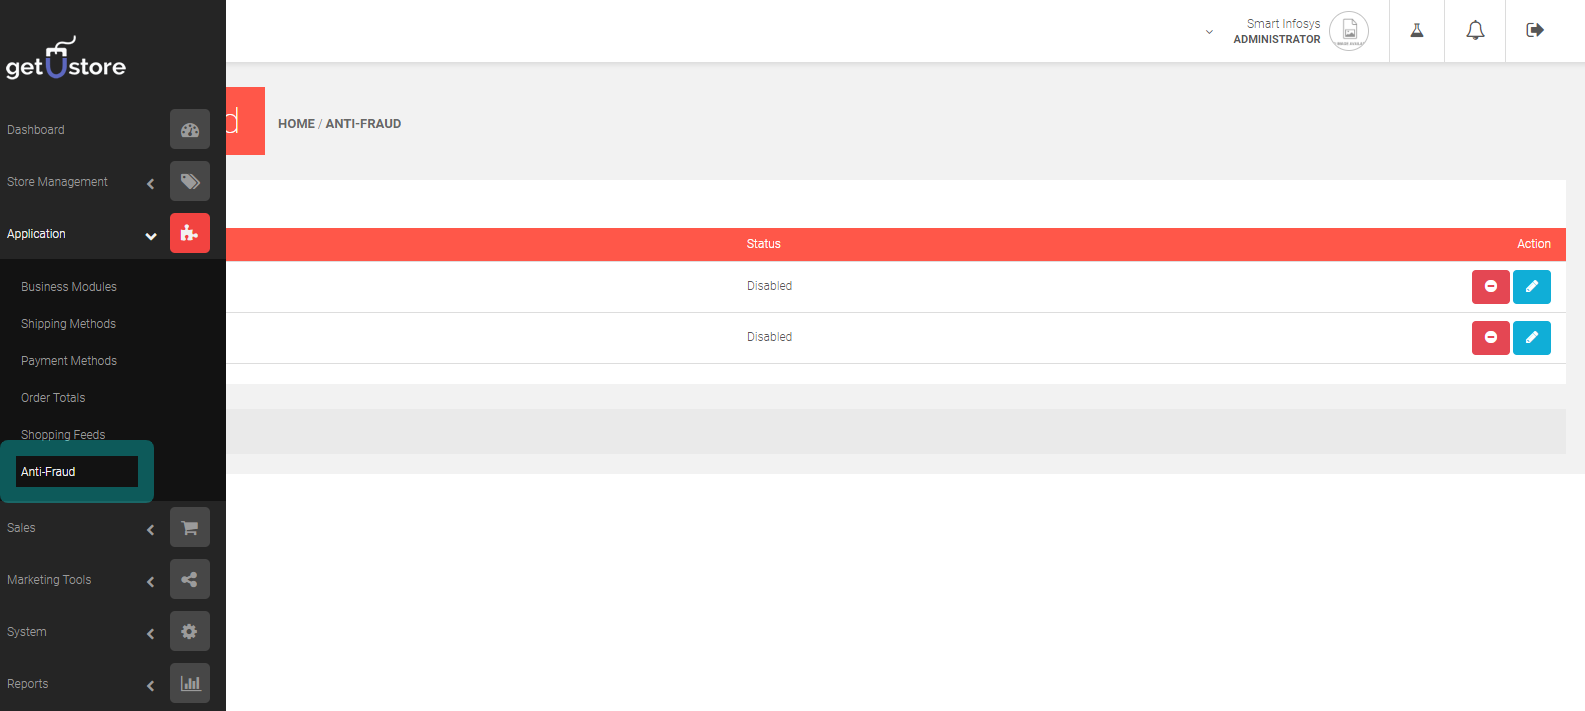
The Anti-Fraud modules can be accessed under Applications > Anti Fraud. The core fraud handling modules seen below are included with the getUstore package.
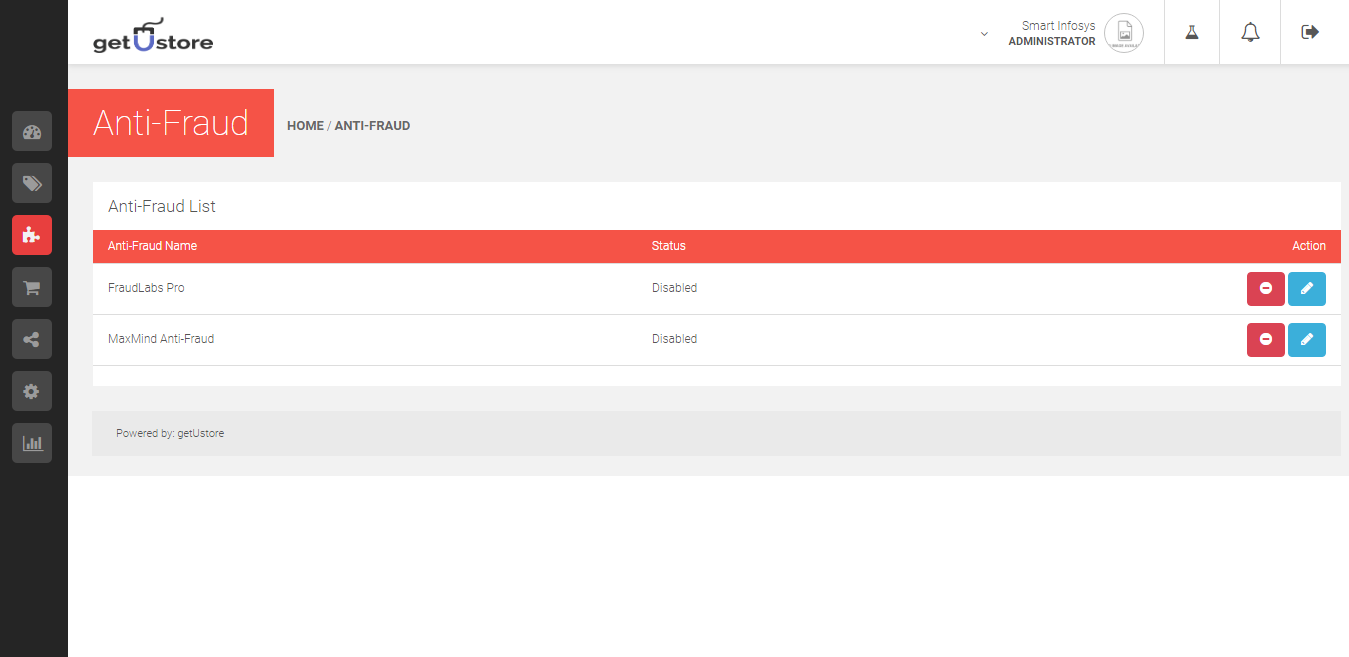
The Anti Fraud Modules must be installed before they are enabled for the store. The process of installation is similar to installing an extension under Applications. Choose the module and click on install button “+” under Action column. You will be notified on the screen that the module is successfully installed.
Once you have installed the module, you can edit the module setting. Let us look at the configuration of the first module FraudLabs Pro.
FraudLabs Pro
This module uses the Fraudlabs Pro service to detect possible fraudulent orders. In order to use the Fraudlabs Pro service, you must obtain the API key and place it in the getUstore Module settings.
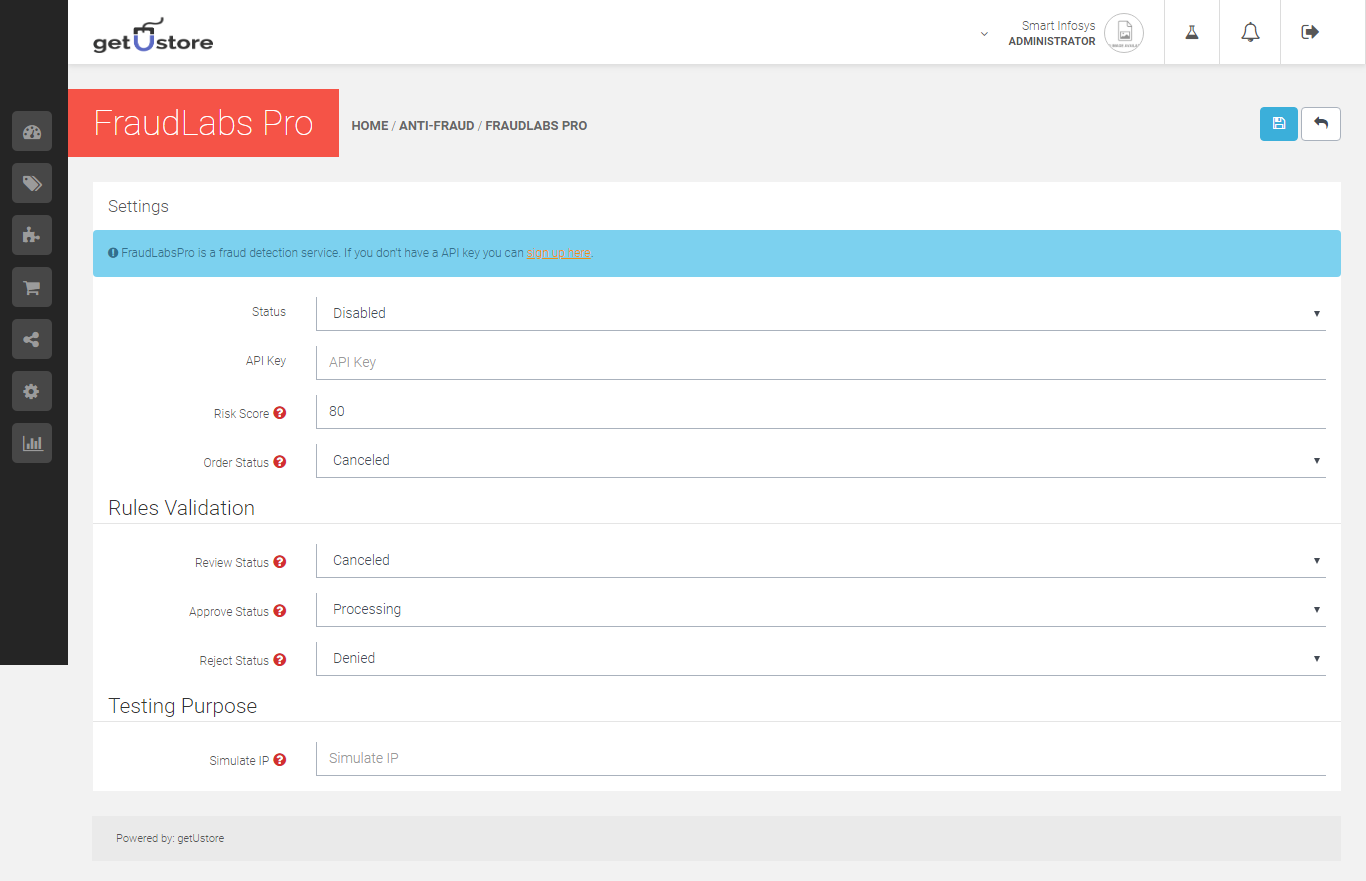
You need to register in the Fraudlabs Pro service to obtain the API key. There are several pricing plans including a free plan. These different plans require different amounts of monthly orders and different amount of validation rules. The validation rules are customizable rules that you can configure in addition to the other checks that FraudLabs Pro makes when screening an order.
Enable/Disable the Module
After you have configured and enabled the module in getUstore, all of your orders will go through Fraudlabs system and get screened for any potential fraud. Once an order is checked from the FraudLabs Pro service it is being given a certain status and a score. There are three possible fraud validation statuses: Approved, Rejected or Pending Review. The score is a value from 0-100, presenting the probability that an order can be fraudulent. The bigger the number is the more risky an order is.
MaxMind Anti Fraud
The second service based fraud handling module in getustore is MaxMind Anti-Fraud. You need to obtain a license key from MaxMind minFraud service in order to use the module and place it in the getUstore module settings.
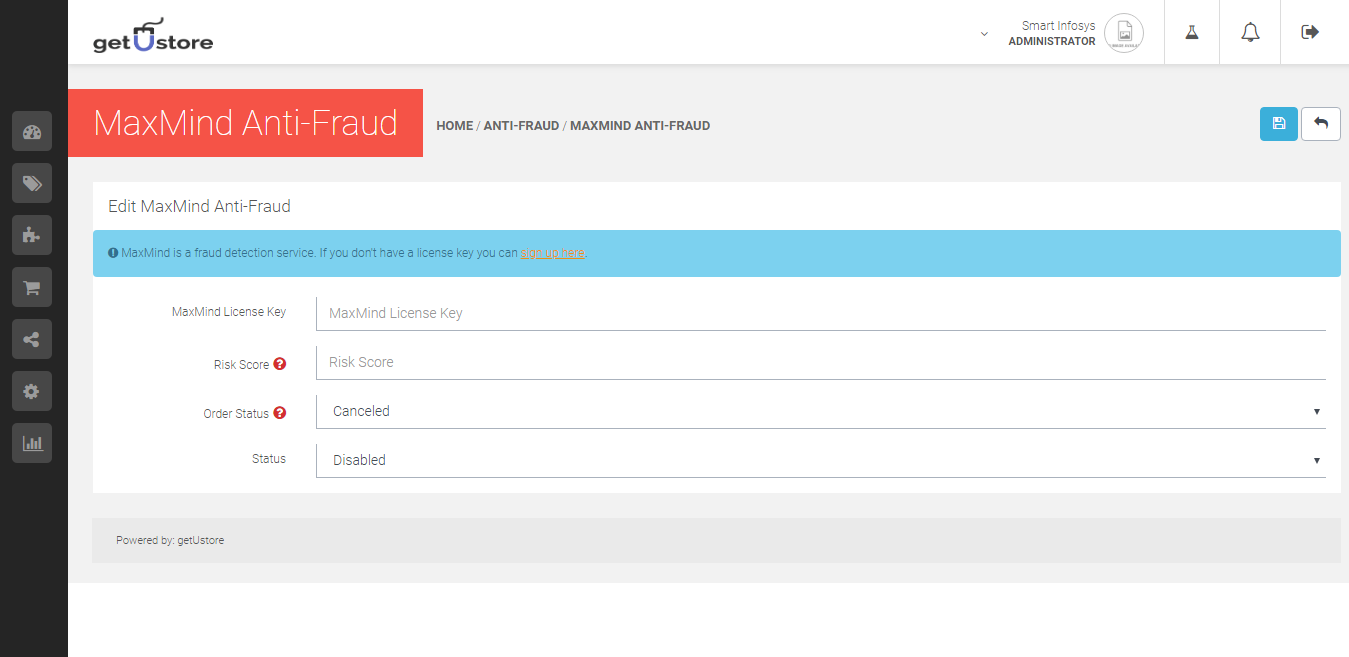
The minFraud service customers pass to minFraud system the service information provided by their site visitors during online transactions and account registrations. The minFraud service analyzes this information and returns a Risk Score. Risk Score ranges from 0.01-100.00 and represents the probability that a given transaction is fraudulent. Once an order is placed in your OpenCart store, the order transaction is scanned in the minFraud system. Once checked, each order is being given a certain Risk Score.
You can manage the Order Total extension for all your orders under Applications > Order Totals. These order totals are the extra payment or fees charged to the customer to the total sum of an order in the store’s shopping cart. For more details, visit Orders section. 

As seen in the above section, few extensions are enabled like Coupon, Store credit, Handling Fee, Reward Points and few more. These enabled order totals will be included in the checkout section. To disable any of these order total extensions, click “Edit” button under Action. If you want to remove an extension, click Uninstall button “-”.
Coupon
You can add Coupons to the Order Totals page by selecting “Enabled” under status. You can set the Sorting order for Coupons as per priority.
Store Credit
Store credit can be added to an order with this extension. The status and sorting order can be selected for checkout.
Handling Fee
In order to include Handling fee to the orders, you need to fill the following information:
- Order Total
- Fee
- Tax Class
- Status
- Sort Order
Klarna Fee
You can add Klarna fee by adding the following information:
- Order Total
- Fee
- Tax Class
- Status
- Sort Order
Low Order Fee
You can include a fee to the order amount if the amount is too low by including the following information:
- Order Total
- Fee
- Tax Class
- Status
- Sort Order
Reward Points
You can also add the reward points option to the order totals. You can enable it under Status and give the Sorting order for priority.
Shipping
You can add the Shipping estimator and it will automatically estimate how much shipping will cost and add the fee to the order total.

Sub Total
You can add the Subtotal by selecting the status and give the sort order for sub totals in checkout.
Taxes
Enable Taxes by selecting the Status and Sort Order in checkout.
Total
Select the status and sort order of the total amount of the order in checkout.
Gift Voucher
You can add gift voucher by selecting the Enabled status and giving the Sort Order.