Articles - Sales
As a shop owner, you would want to know who your customers are and have all their information in one place and in a structured format. You can access the admin panel to sort the customer information efficiently in order to remember any transactions made with their account. Login to getUstore and access the admin panel. You can manage Customers under Sales > Customers > Customers.

Customers

When a customer creates an account or completes the checkout process, getUstore will store all their information automatically in the administration. You can access this information under Sales > Customers > Customer. You will be able to see a complete list of customers on the page, along with the following information:
- Customer Name: Name of the customer
- Customer Group: It is a designated group of customers defined by the shop owner used to apply discounts or special offers or send group emails.
- Approved: The approval of customer account after its creation
- Date Added: The date the customer account was created
- Status: The status showing denial or approval of the customer account.
- IP: The IP address showing the location of the customer.


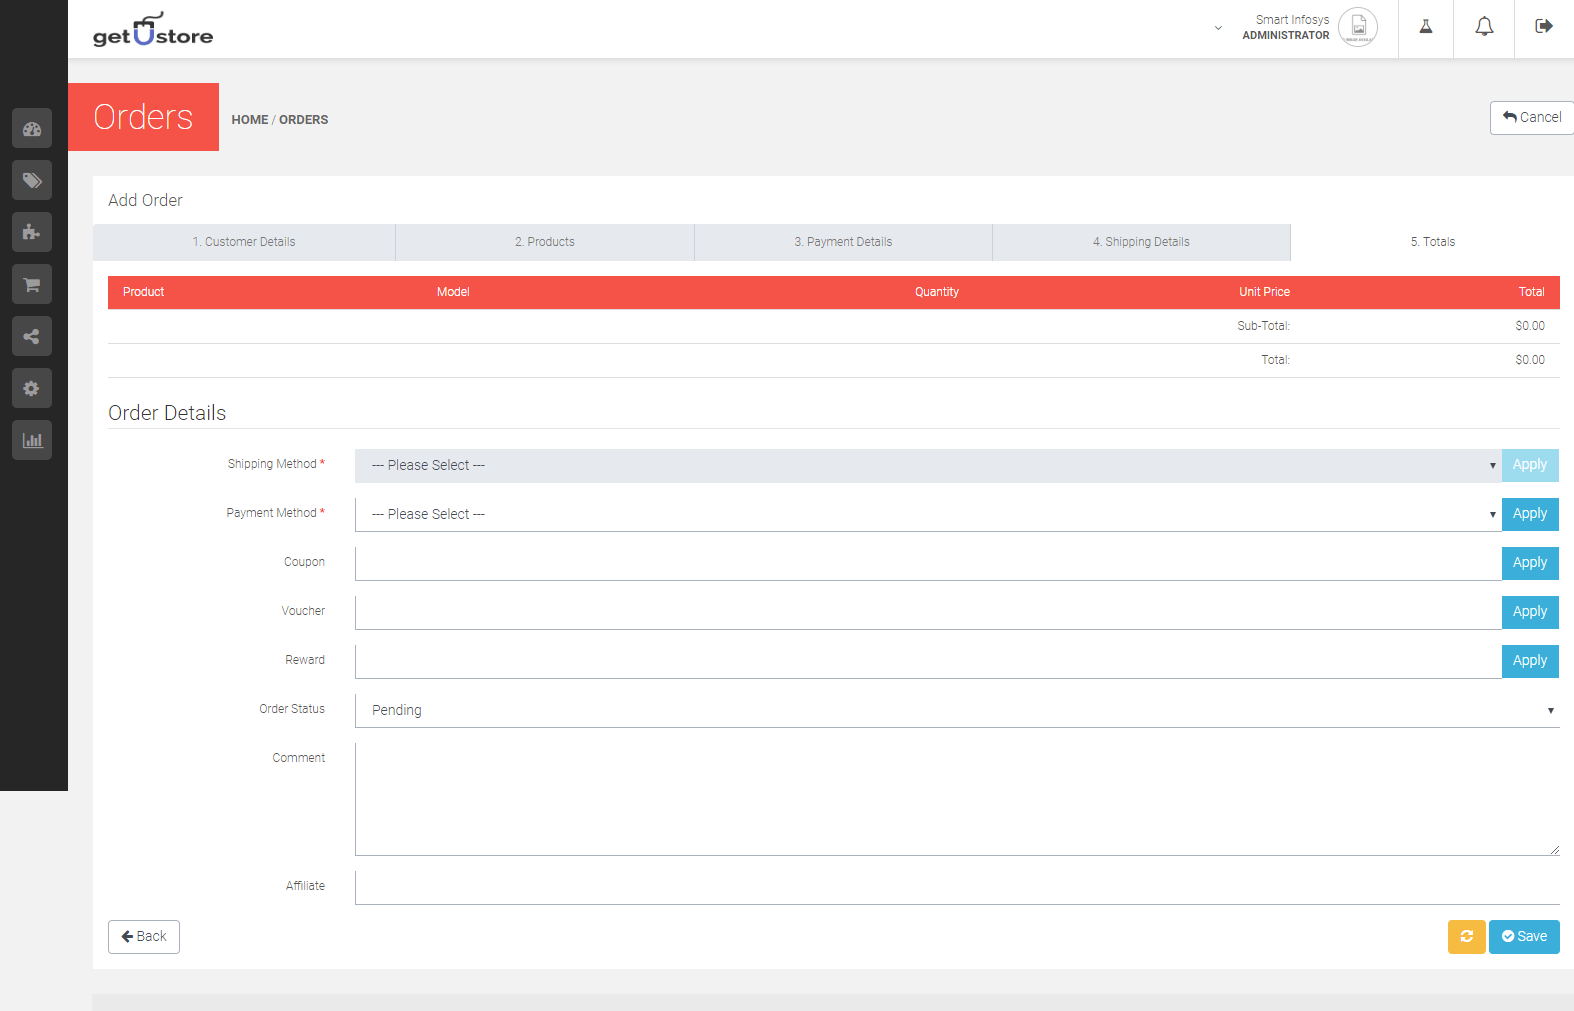
Though customer orders are automatically updated to the Order section after a customer confirms checkout, you may want to edit or add orders manually sometimes. This could be to add reward points or gift vouchers. When you want to manually add a new order, click the add button “+” and to edit an existing order, click the edit button under action column.
Customer Details
The first section while modifying an order is Customer details. You can type in the customer name that has already setup an account on the website and that will auto complete the form by bringing up all the details to fill in the form.
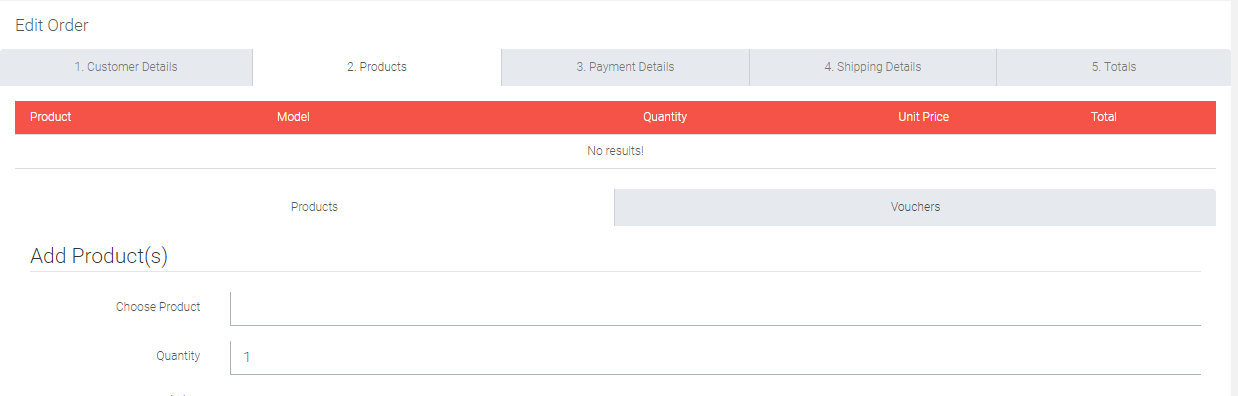
Products
In this section, you need to type the product name in “Choose Product”. A drop down list will appear with products containing that name. You can select a product from this list and it will bring up specific product options for this order.

Payment Details
The customer should add an address and you can select their address option under “Choose Address”. In case the customer has not added the address you will have to manually fill in the address into the form.

Shipping Details
In this section you can track the shipping address for this particular order. If the shipping and payment address are the same, you can copy and paste the information above when adding it manually.
Totals
In this section you can add any gift vouchers or reward points. You can look at the total order, amount, products purchased and quantity. And then you can save all the filled information by clicking on “Save”.

The sections above such as Coupon, Voucher, Rewards are extensions that were enabled specifically for this form. There is an option to customize the order details included in the totals by editing, uninstalling, or enabling specific order total extensions.
Printing Invoices
In order to print an invoice, you need to go to the Orders section under Sales > Order. On the top right corner of the page you will see the button Print Invoice. Select the order that you needs to be printed and click “Print Invoice”. This action will take you to the printable page of the invoice and you can get the invoice printed to include in with the shipping.
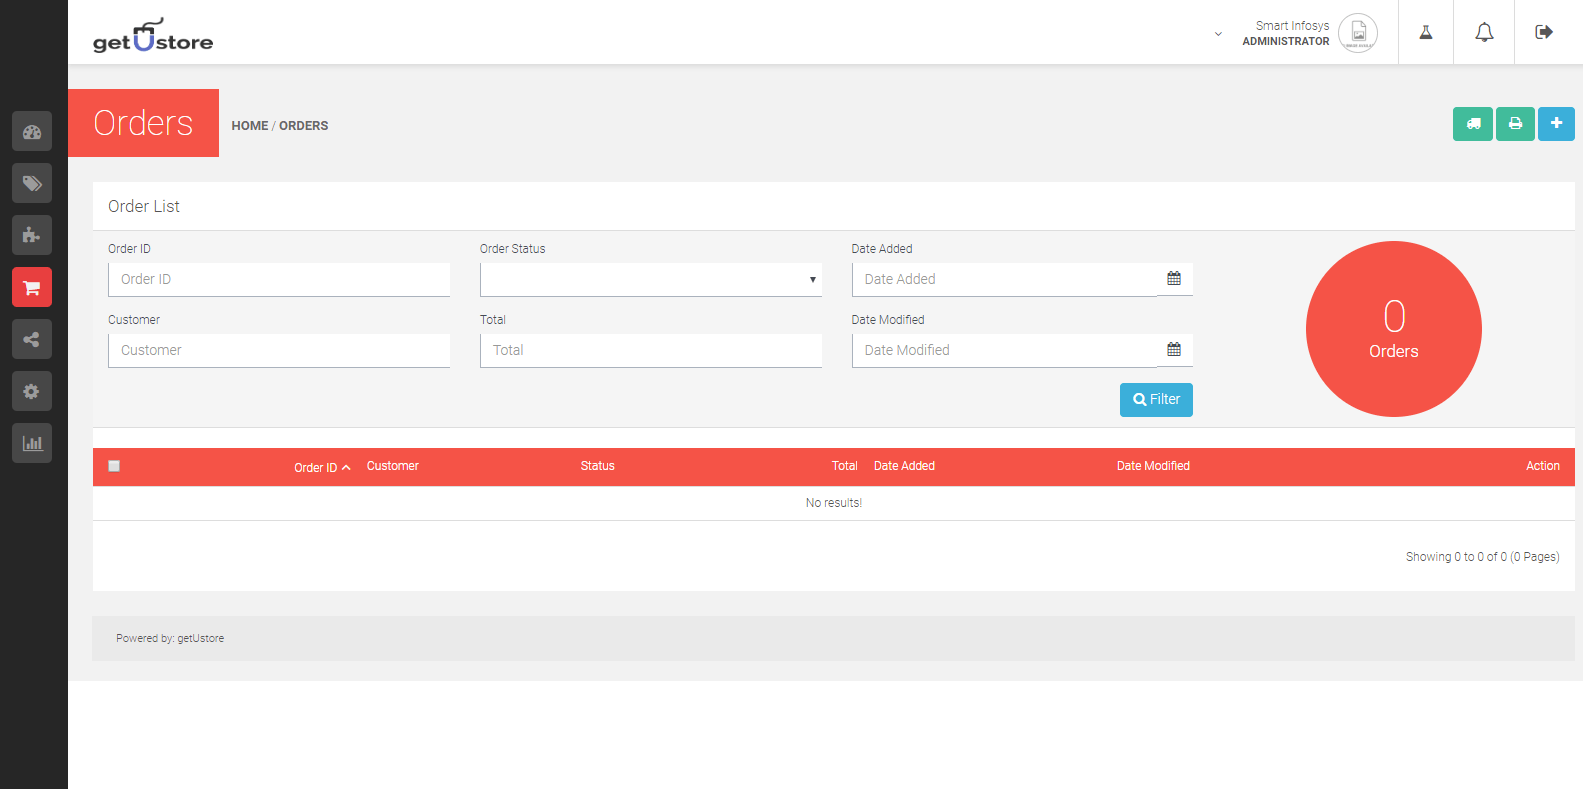
This section is helpful in managing all your orders. When a customer completes a purchase i.e. goes through checkout, the information on their order is automatically transferred to the Orders section so that you can keep track of your orders. In the admin panel, you can view all the orders made on the website and can edit the details of existing orders. You can also manually add orders.
The Orders section can be accessed by Sales > Orders on the left side navigation panel. The following details are to be filled in for each order on the list:
- Order ID:It is a number assigned to the order on your getUstore shop during the checkout confirmation of the order.
- Order Status:Update of the status of the order. After the order is initially created the status will be “Pending”. The default options are Missing Orders, Cancelled, Cancelled Reversal, Chargeback, Complete, Denied, Expired, Failed, Pending, Processed, Processing, Refunded, Reversed, Shipped, and Voided.
- Date Added:The date the order was made.
- Customer:Name as given by the customer.
- Total:This is the total price of the order.
- Date Modified
With the orders included in the list, there is an option to edit, insert, delete, search, or print an invoice of an order.
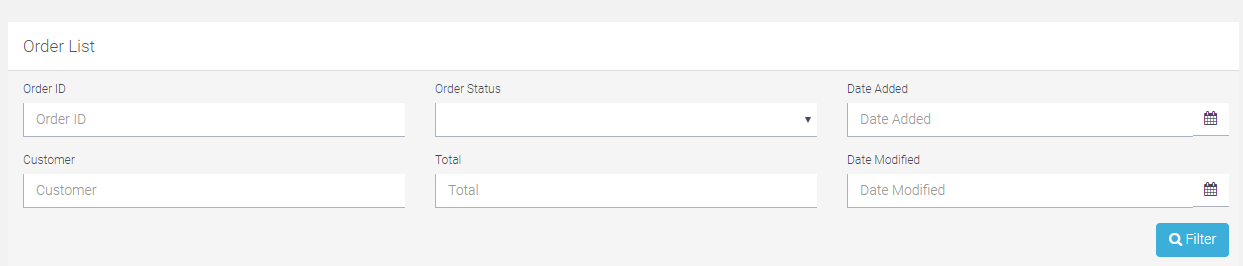
Search for an Order
You can search for any specific order/orders with the help of “Filter” button. Fill in the specifications in the box and click on “Filter” button. This can help you locate orders by date, customer or status, etc. For more information on the Filter tool, see Filter section.
Payment Details
The customer should add an address and you can select their address option under “Choose Address”. In case the customer has not added the address you will have to manually fill in the address into the form.
Shipping Details
In this section you can track the shipping address for this particular order. If the shipping and payment address are the same, you can copy and paste the information above when adding it manually.
Totals
In this section you can add any gift vouchers or reward points. You can look at the total order, amount, products purchased and quantity. And then you can save all the filled information by clicking on “Save”.
The sections above such as Coupon, Voucher, Rewards are extensions that were enabled specifically for this form. There is an option to customize the order details included in the totals by editing, uninstalling, or enabling specific order total extensions.
In this section, you need to type the product name in “Choose Product”. A drop down list will appear with products containing that name. You can select a product from this list and it will bring up specific product options for this order.
Printing Invoices
In order to print an invoice, you need to go to the Orders section under Sales > Order. On the top right corner of the page you will see the button Print Invoice. Select the order that you needs to be printed and click “Print Invoice”. This action will take you to the printable page of the invoice and you can get the invoice printed to include in with the shipping.
Recurring orders are the payments that you as an administrator set for customers that have to be billed on a recurring basis. They are set up from Store Management > Recurring Profiles.
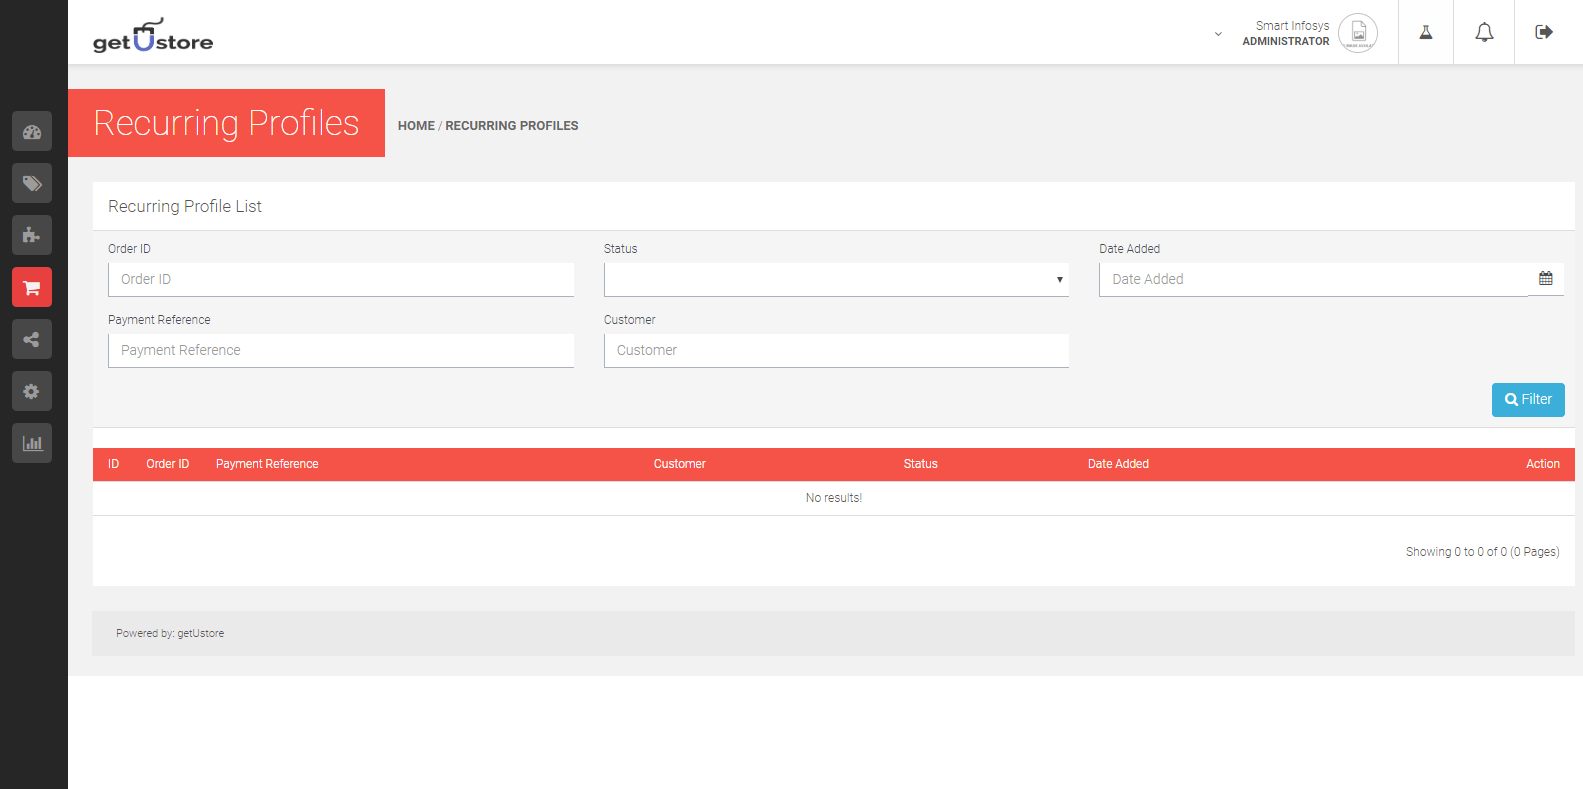
You can access Recurring orders through Sales > Recurring Orders. Through this section you will be able to filter through the recurring payments that you have set to recurring profiles. You can learn more about Profiles in the profiles section.

You need to fill in the following details:
- Order Id: The identification of the order that is associated with the recurring payment
- Status: The status of the payment in payment methods
- Payment Reference: It is the ID of the recurring profile
- Date Added: The date the order was added
- Customer: Name of the customer in getUstore portal.

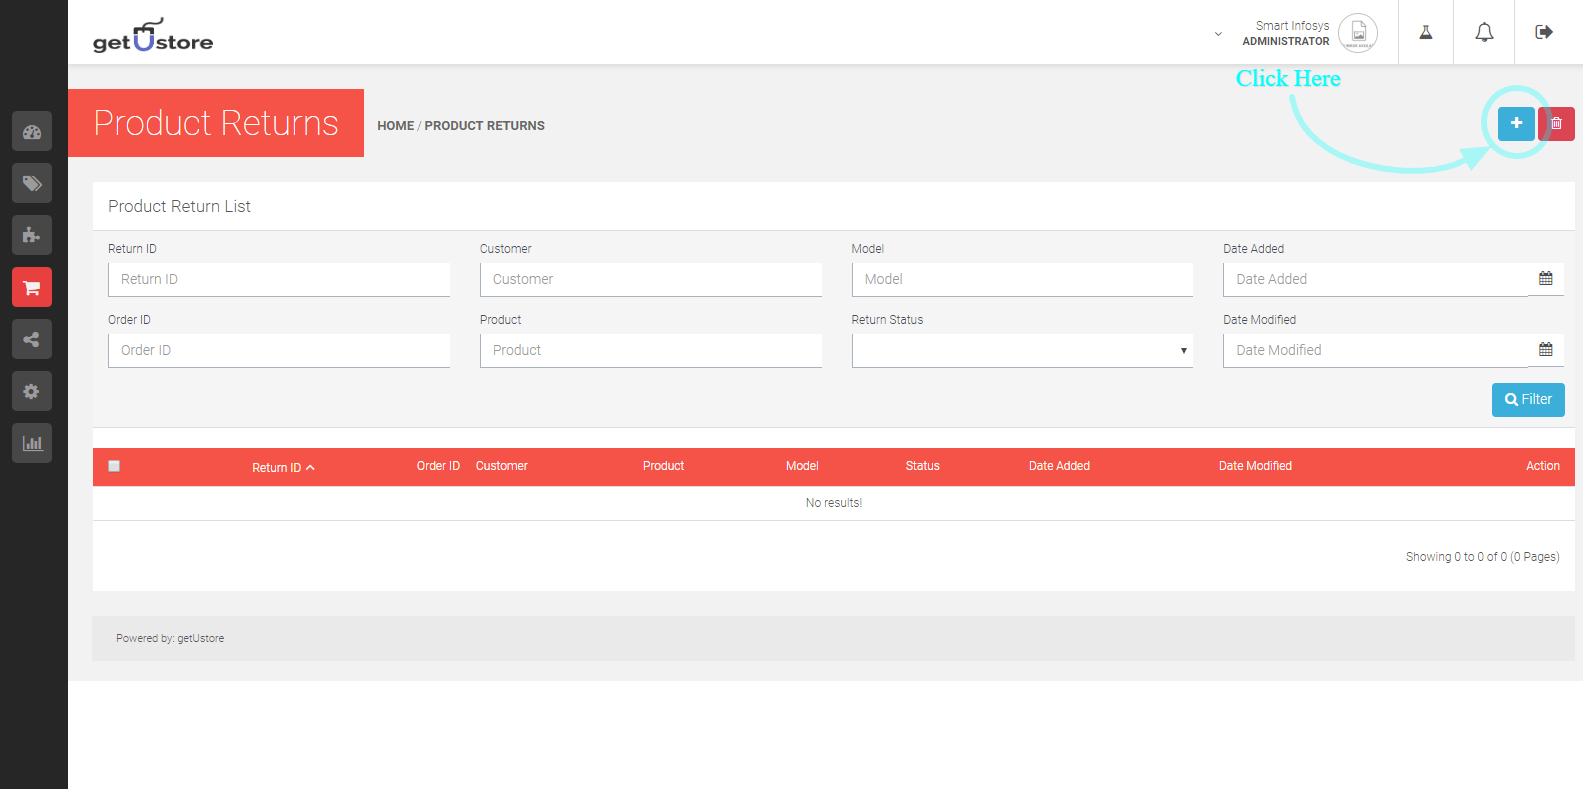
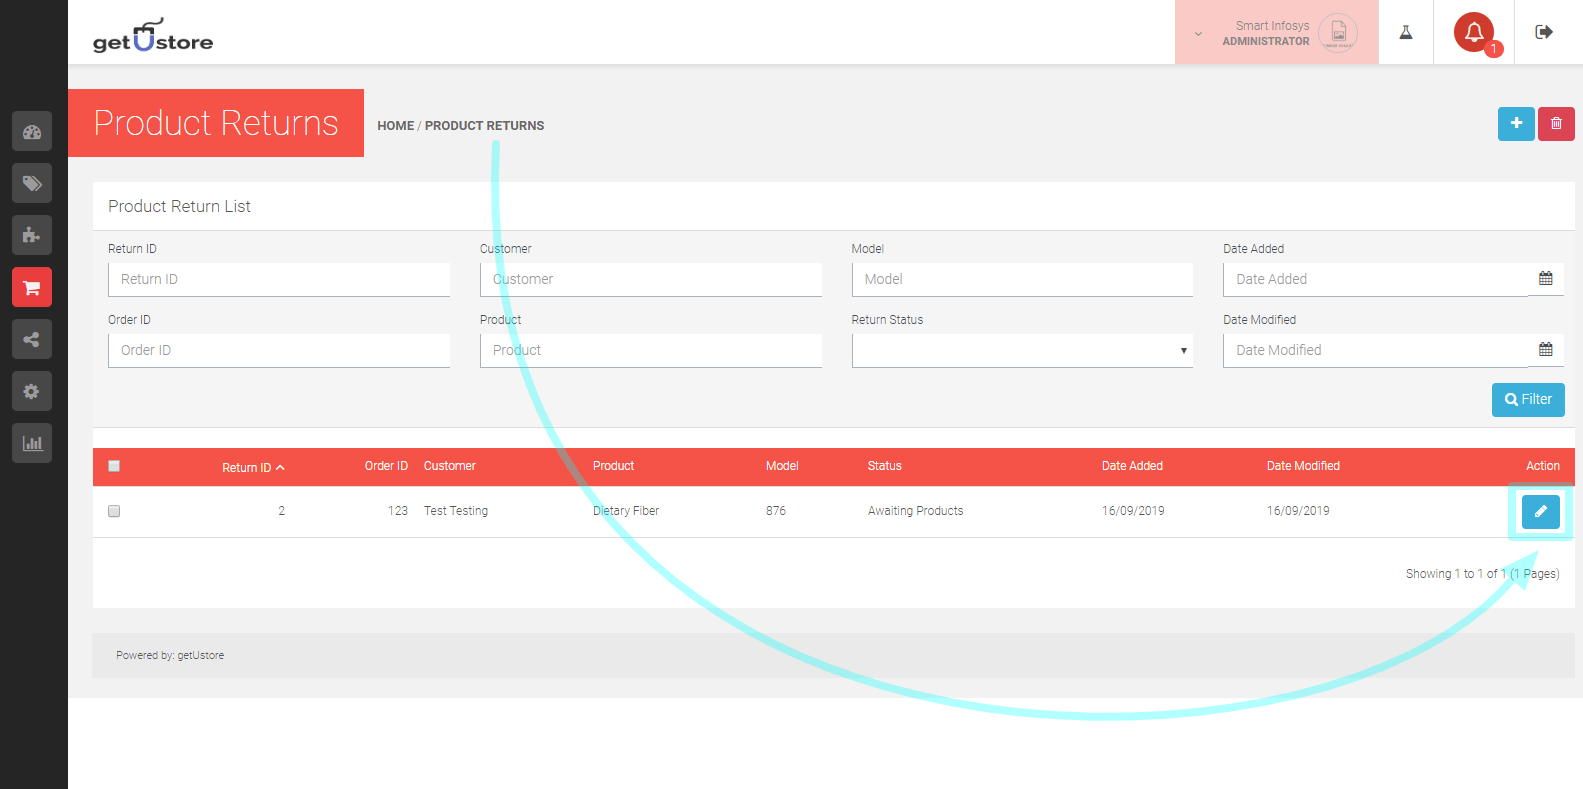
This section helps you manage the merchandise returns to your store. You can access this section through Sales > Returns. You have to manually enter the product and return information to create a new return for your store. To create a new return click on the Add New button on the right side of the page.
Return details
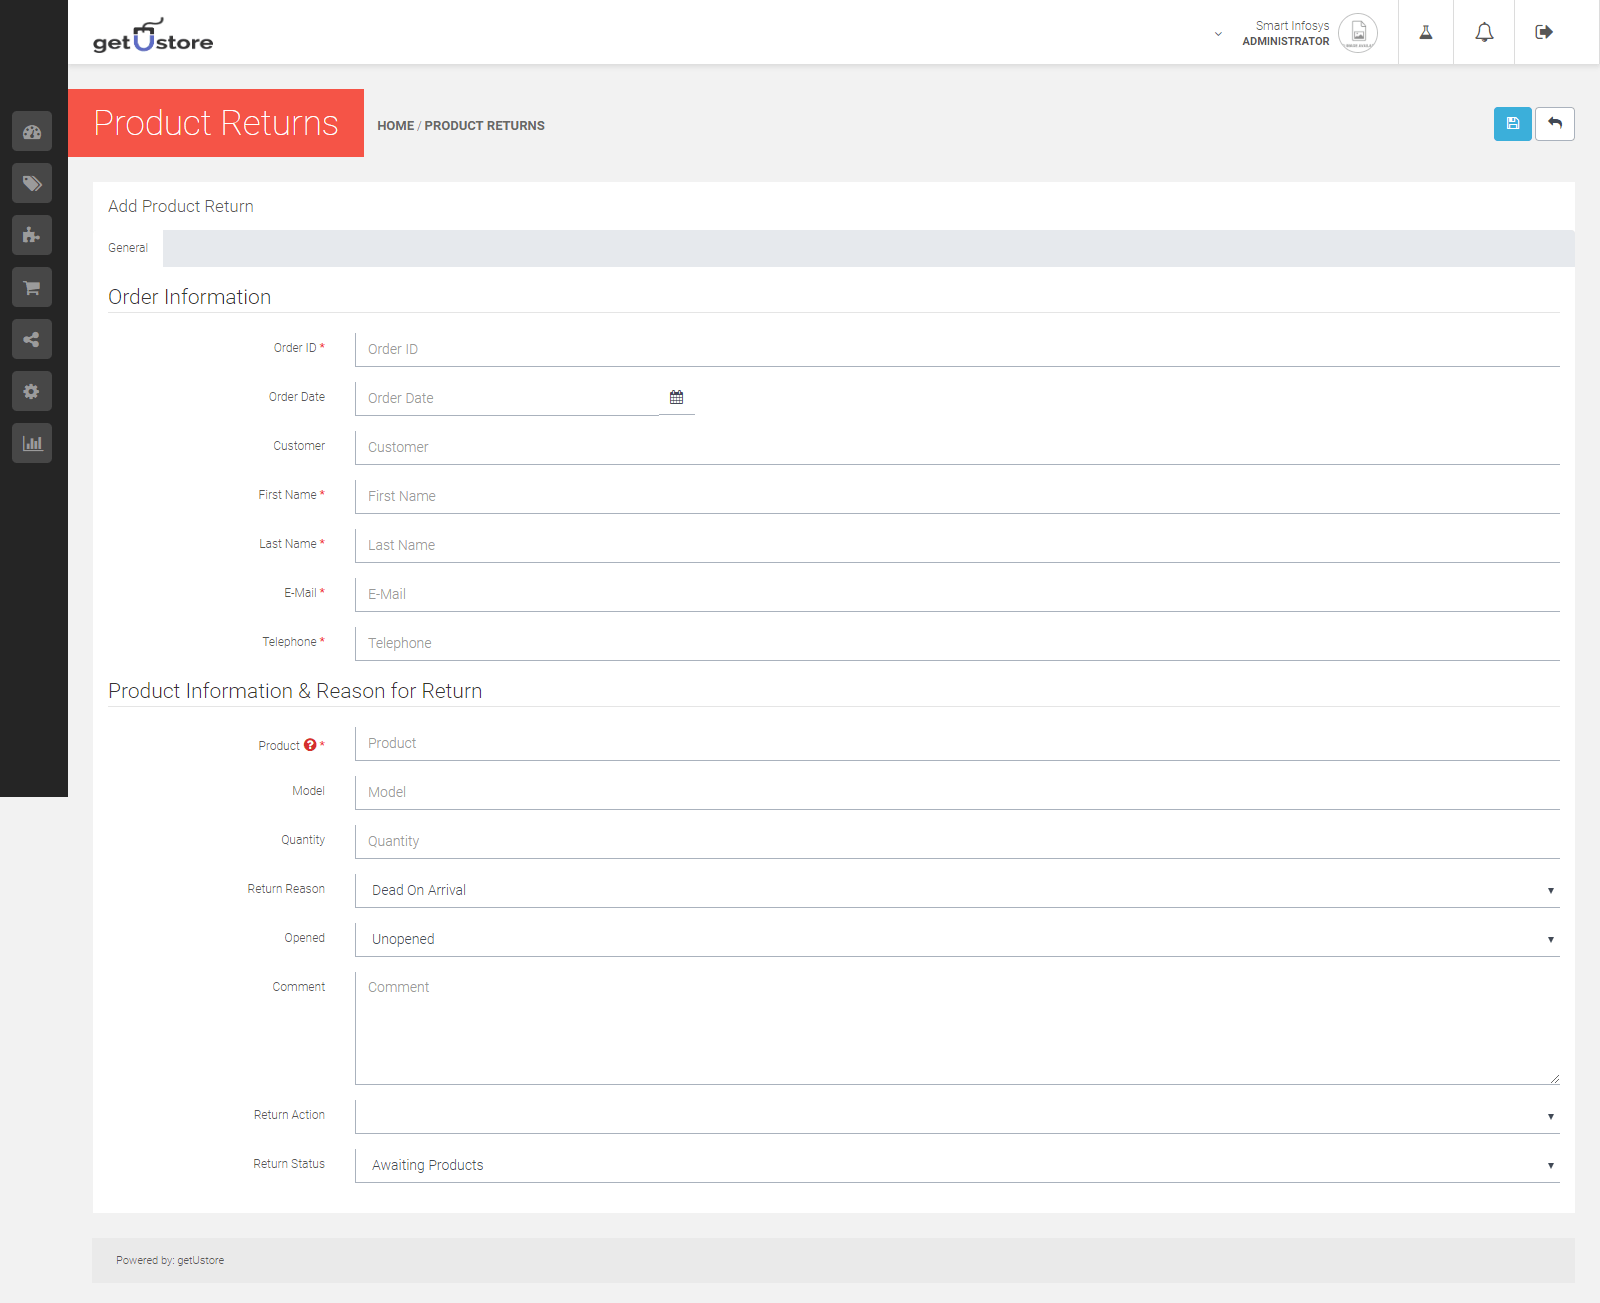
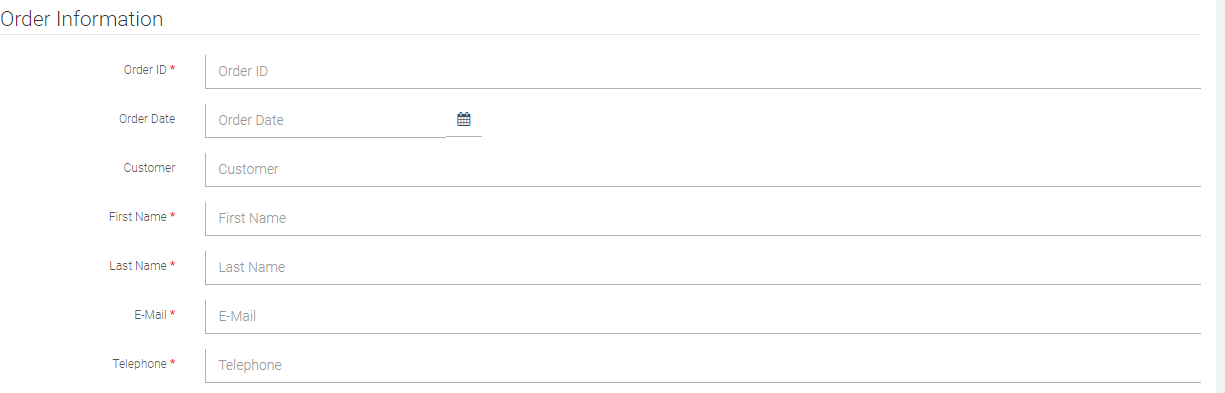
You need to fill in the General Section to Add a new return:
- Order ID:The original ID of the order to be returned.
- Order Date:The date the order was made.
- Customer
- First Name
- Last Name
- Telephone
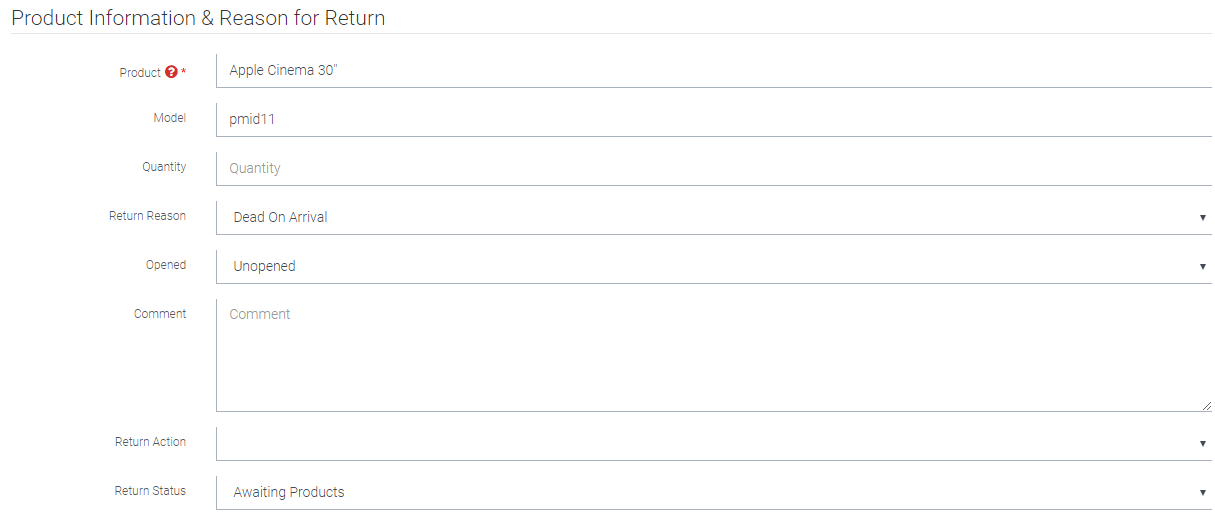
Product Information & Reason for Return
The next section to be filled is Product information and reason for return. You need to manually type in the product and that the customer returned. Type in the name “Apple” and it will bring up a list of all products of the company in the drop down. Select “Apple Cinema 30” as the product to be returned and the Model space will be auto completed for you. You can include the quantity, the reason for return, whether the product was opened or not, customer’s comments. return action and the return status.
All merchandise returns are automatically added to the Returns section when they submitted by the customer. The Returns form is located in the storefront on the Returns page, under Customer Service in the footer. The information filled out in this form will be saved in Sales > Returns. The customer will get the same form to be filled as seen above. You will be able to edit the status of the return to Awaiting Products, Pending, or Completed. When the status is updated in the admin panel, the customer will be able to view the status of their order under My Account > “View your return requests” in the storefront.
Once you click on the edit icon, you’ll be redirected to the page below:
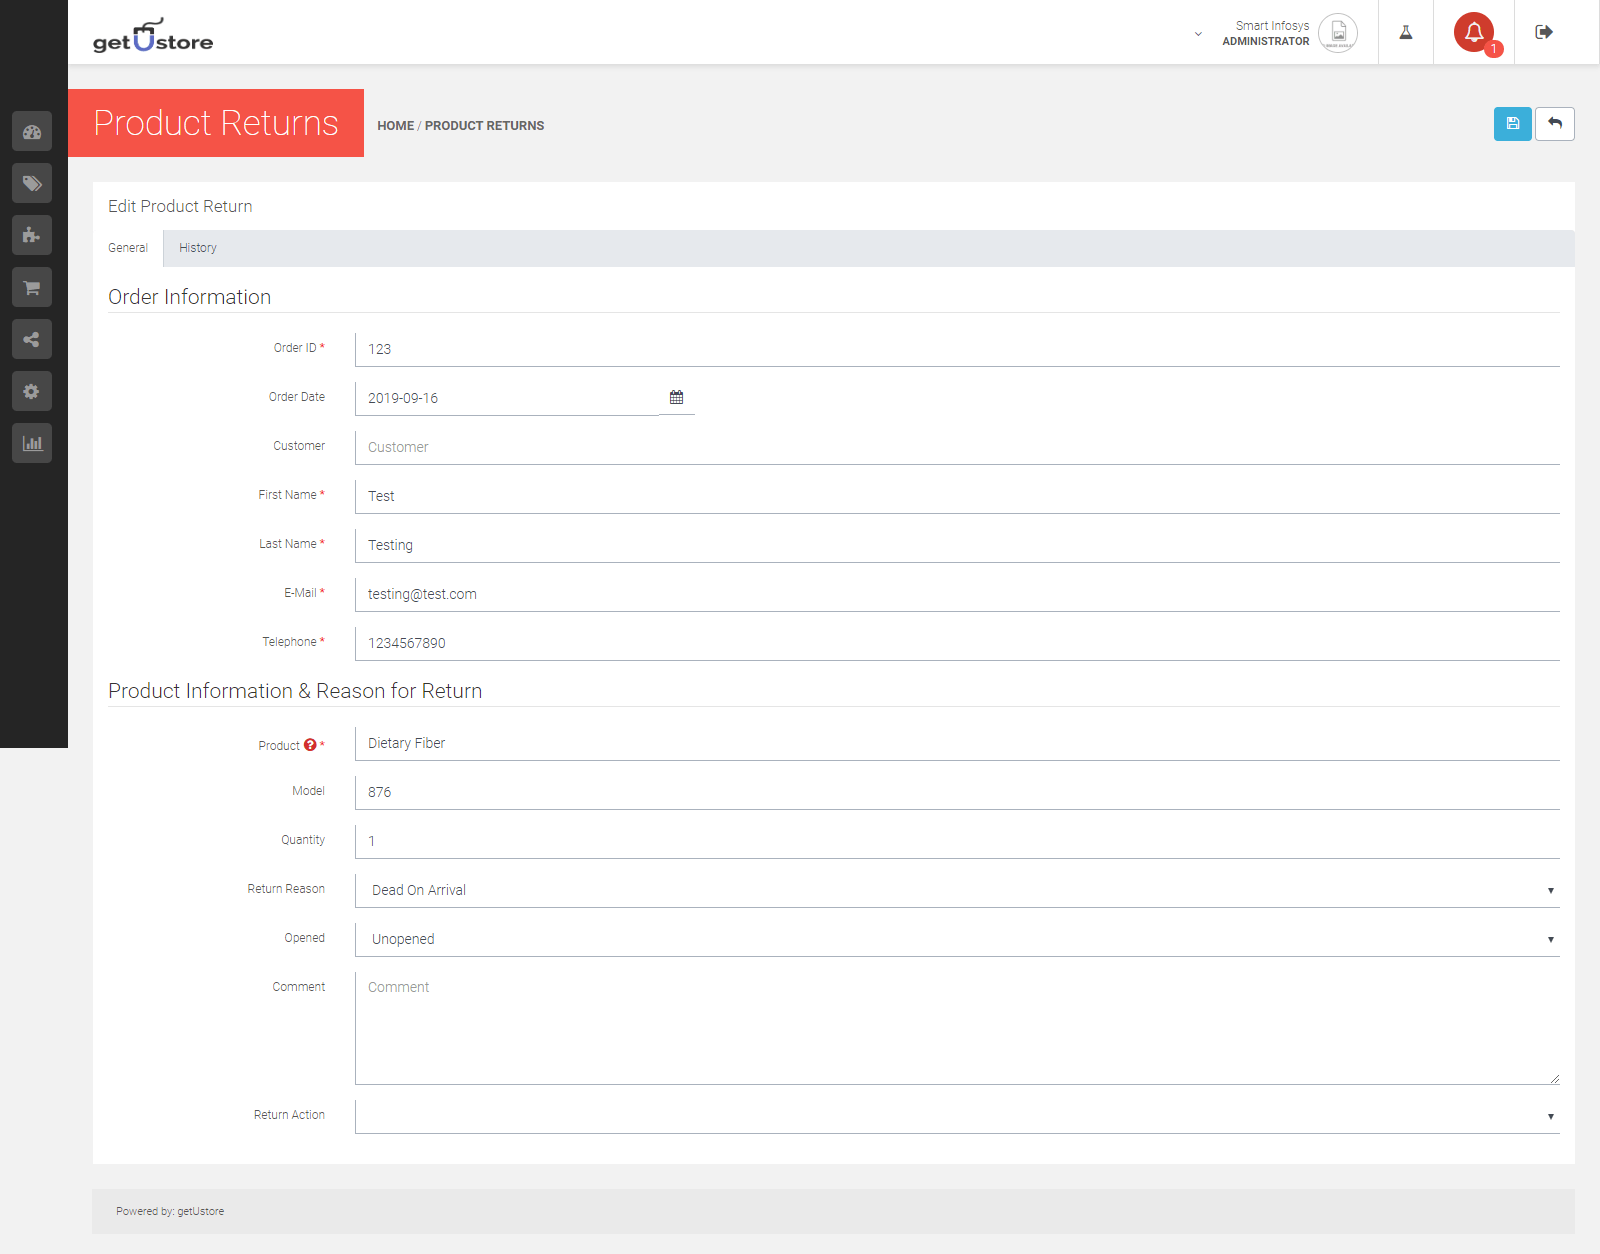
Make the Necessary changes & save it.
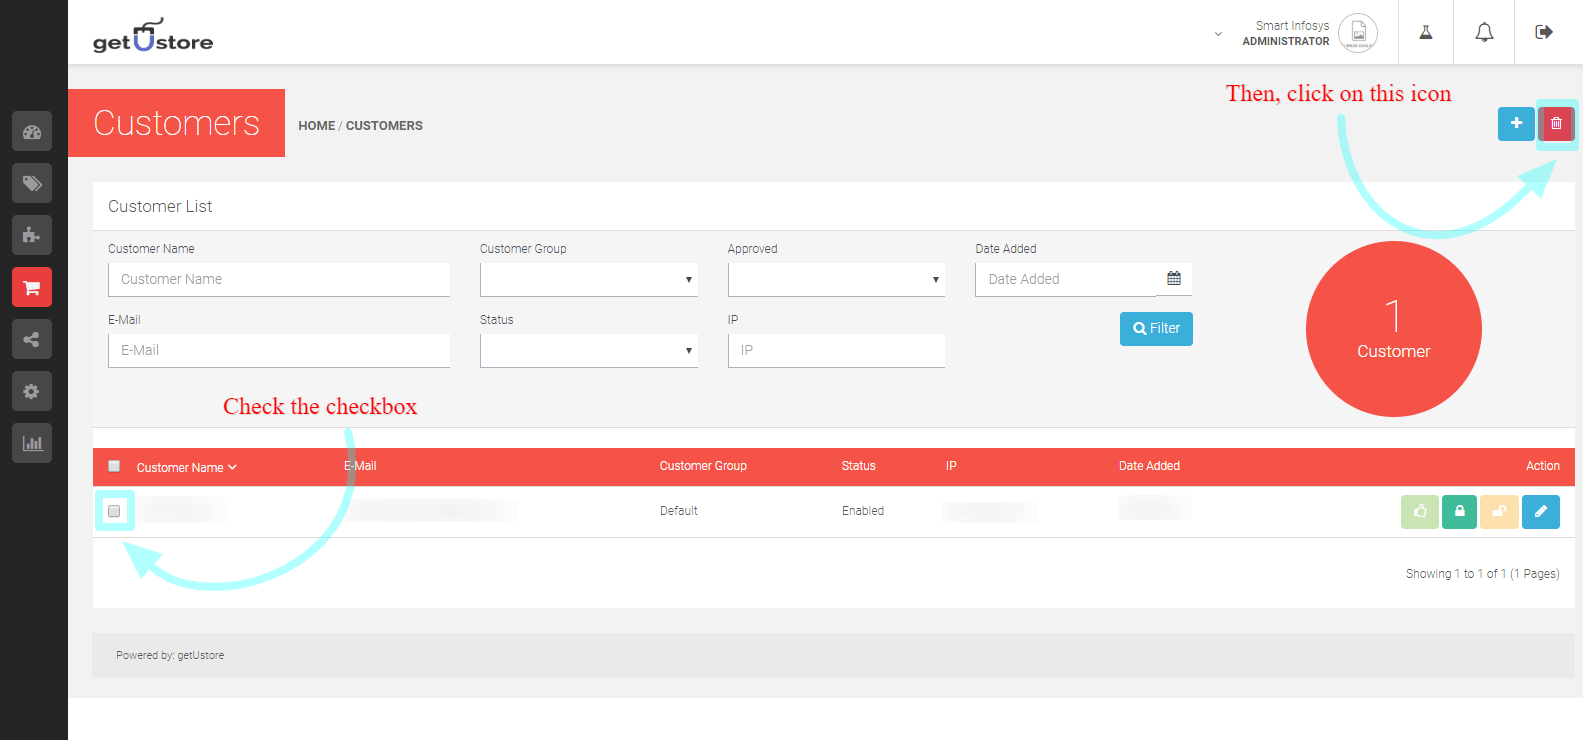
You can check the checkbox & then click on the delete icon to delete the return.